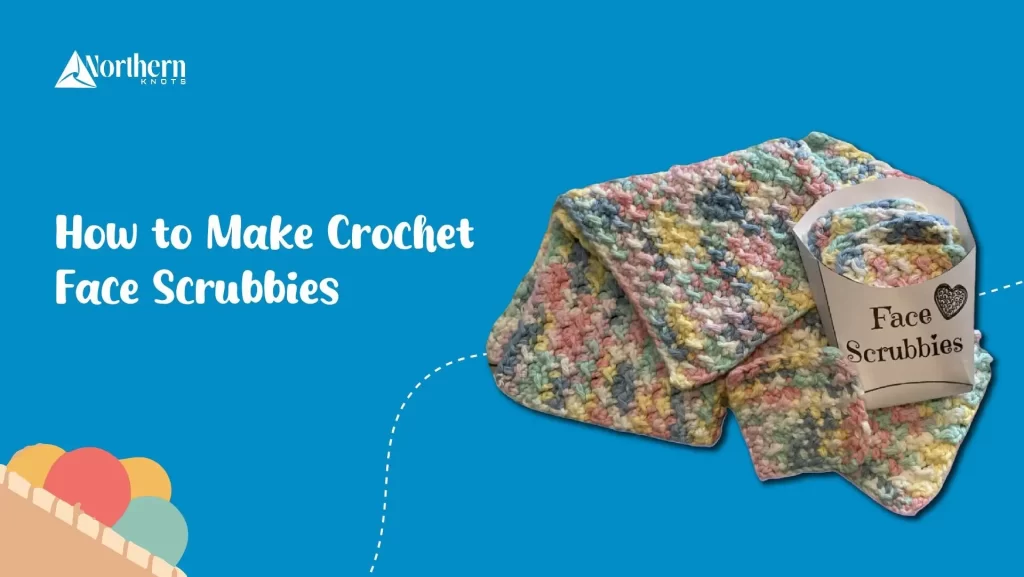
Dreading the constant disposal of cotton pads every time you cleanse your face? Thinking about making a change for the better of both the planet and your skin? Try crochet face scrubbies to achieve that double success. These soft, eco-friendly, reusable pads are super-duper easy to make and will without any doubt, totally, your skincare regimen. Let’s look at some of the reasons why crochet face scrubbies should be your next pick for your next skincare haul. The Benefits of Crochet Face Scrubbies Before we get into the how-to, let’s talk about why these face scrubbies are a game-changer for your beauty routine. Natural Choice for Disposables Disposable cotton pads are a real nightmare for the environment. They always blend in with other waste products and are very difficult to dispose of properly. The best part about the crochet face scrubbies is that they are all-natural because they are derived from 100% cotton yarn that is both biodegradable and reusable. Reusable and Eco-friendly A crochet face scrubbie can be reused for even twenty washes before you have to throw it away. You don’t have to shop for new cotton pads every month. Both the environment and your pocket will be better off as a result of buying these scrubbies. They may go well for a few months or even a year. Best for All Skin Types Are you dealing with sensitive skin issues? Don’t worry! The crochet face scrubbies are nice, soft, and immune to any kind of discomfort. They are made of 100% cotton yarn, which means that they are non-allergic and soothing to every skin type. Whether you are using them for makeup removal or simply cleansing, your skin will adore these little guys! A Perfect Dream Gift Want a present that is as unique as it is adorable? You can make scrubbies for your face with crochet. It is easy to personalize, eco-friendly, and it is nice to make. Whether it is for a birthday, holiday, or just because, these scrubbies are a thoughtful, planet-friendly gift that anyone would love to receive. Seriously, who will not be happy to receive a handmade eco-friendly gift? What Materials Would I Need for My Crochet Scrubbies This is a checklist of what you should have to make face scrubbies of your own in crochet. You do not need a huge shopping list for that. Don’t worry! 100% Cotton Yarn This is important to your success. It is very soft, absorbent, and gentle on your skin. Moreover, it is strong enough to keep up with washing cycles for a long time. Crochet Hook The average size is 4mm hook for the face scrubbies, but this depends on the fluffiness of your yarn, the size might differ. Scissors & Yarn Needle You will need scissors to cut the yarn, and a yarn needle to tuck in those ends when you are done. Pattern or Stitch Guide You can follow a free pattern or create your own design. Either way, you will be crocheting like a pro in no time. Try to find organic or recycled cotton yarn if you want an even better eco-friendly alternative! How to Make Crochet Face Scrubbies Let’s get started! Here is a beginner-friendly, no-fuss guide to making your own crochet face scrubbies. Step 1: Start with a Magic Ring Start by making a magic ring (also called a loop). This is the base of your scrubbie and lets you tighten the center for a clean finish. Step 2: Crochet a Chain Form a circle with 3 chain stitches, then crochet a double crochet stitch in the middle. You need to aim for 8-10 stitches to keep the base even and neat. Step 3: Join the Round and Keep Going Join your round with a slip stitch and keep crocheting in a circle. Keep going until your scrubbie reaches the size you like. Need it bigger? Add more stitches! Smaller? Just subtract a few. Step 4: Finish and Secure the Yarn Once your scrubbie is the right size, cut the yarn and tie it off. Use a yarn needle to tuck in the loose ends, and if you want to add a little extra flair, finish it with a cute border! Best Crochet Patterns for Face Scrubbies Want to get creative? Here are a few fun crochet patterns to try: Simple Round Pattern A classic, soft, and beginner-friendly round scrubbie for everyday use. Textured Patterns Try ribbed or shell stitches for added texture and extra exfoliation. Fun Shapes Feeling adventurous? Go wild with roses, hexagons, or any other fun shapes you can dream up! Why Make Your Own Crochet Face Scrubbies? Sure, you can buy crochet face scrubbies online, but making them yourself comes with its own set of perks. How to Care for Your Crochet Face Scrubbies When your scrubbies are prepared and arranged, the key is to keep them in the best condition as follows: Washing Instructions Soak your scrubbies in warm water with a mild soap. You can use a machine to wash them, but hand washing is a better choice if you want them to maintain their shape. Drying Tips Place your scrubbies on the flat surface, free from deformations to dry them. Avoid the tumble dryer. It compresses the cotton fibers to disarrange their shape. Let the air dry it! Storage The best place for your scrubbies is to be kept in a dry, well-ventilated place, such as a tiny and cute basket right there by your sink. This way, they should be ready to be used all the time. Final Thoughts Crochet face scrubbies are an effortless, artful, and ecological way to make your skincare routine more effective. They are soft to your skin, to the budget, and can be customized to your personal style. Also, they are an excellent gift! For those who are inexperienced in crochet and those who have been doing it for a long time, this project is interesting, fulfilling, and of course, eco-friendly. So, get the
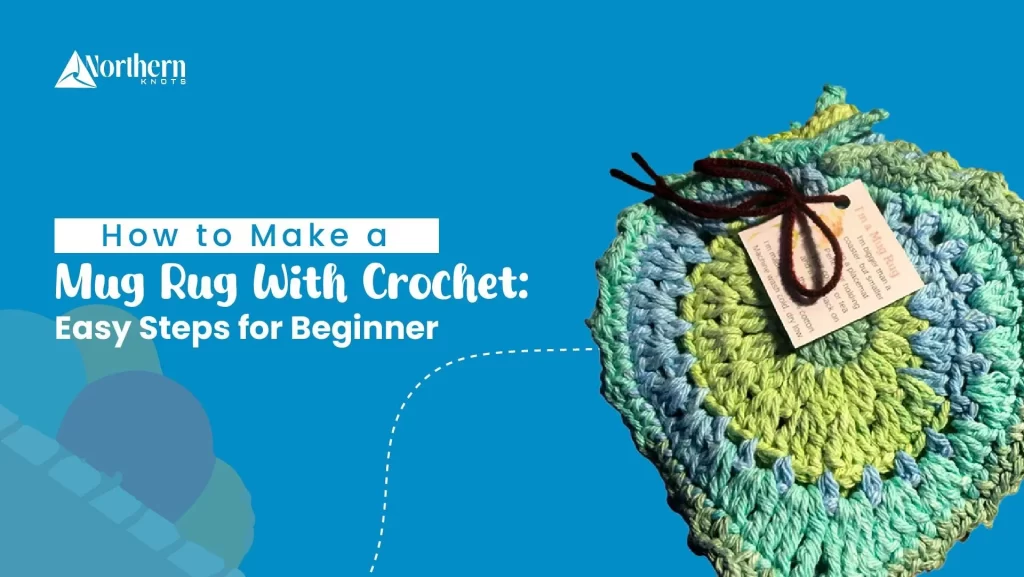
Don’t we all sometimes feel like the winters are just not going, but you feel the spring in the air day by day? This is where people like to make new things to welcome the new season. And that is actually a good idea to get your home ready with a handmade crochet mug rug. If you are a crochet lover and love knitting, one of the best things you can do with your cotton yarn is make coasters and mug rugs with a seasonal touch. Whether you want to crochet a mug coaster, a mug rug, or a flat stash buster, these free mug rug crochet patterns will equip you with easy steps to start working on your project. Why a Mug Rug? Everyone can agree that coasters are great, but sometimes we have bigger cups, bottles, or other items that are too big to fit on a coaster. This is where the mug rugs come in the light because they are more versatile and better! If you are someone who runs out of patience quickly, then crocheting these mug rugs won’t use much of your time and your yarn, and you will create these rugs in a jiffy! Introducing The Simple Mug Rug Pattern Mug rugs are such a fun and easy project to make for your home. They also make great gifts for your family members as a housewarming gift. The simple crochet mug rug pattern is a beginner-friendly pattern and is a great project for practicing the single crochet stitch with ‘easy to follow’ instructions. It uses a single crochet stitch to create this lovely texture. Tip: A set of four mug rugs tied up with a piece of yarn in a bow is such a sweet gift idea. Supplies You Will Need Let’s say you want a 4”x 6” mug rug size without the fringe, and with the fringe added, it is 4”x 8” approximately. Yarn: Category (4) Worsted Weight Yarn in any colour of your choosing. You will need one skein if you want to make a set of four. Hook: H-5.00mm Notions: Yarn needle, Scissors. Gauge: 13 sc x 14 screws = 4” x 4” square Abbreviations (uses US conventions) ch= chain st= stitch sc= single crochet dc=double crochet Pattern for the Simple Mug Rug Chain 14. Row 1: Dc in 2nd Chain from hook. Dc in each remaining chain (13 St) Row 2: Ch1 and turn work. Sc in first stitch and each stitch across (13 St) Row 3: Repeat Row 2 (13 St) Row 4: Ch2 and turn work. Dc in first stitch and each stitch across (13 St) Rows 5 – 8: Repeat Row 4 (13 St) Rows 9 – 10: Repeat Row 2 (13 St) Row 11: Repeat Row 4 (13 St) The Fringe (Optional) For the fringe, lay the mug rug on a flat surface with the right side facing up. Cut the strands that are 4 inches long. (You can also use a business card to wrap around it.) Place 12 fringes across each end of your mug rug. Wrap the yarn around the card 24 times, it will allow 2 strands of yarn for each fringe. Cut through all the strands of yarn, which are folded, put the ends together, and create the loop that can be threaded into the edge of the mug rug, and then make a knot on it. This creates a 4-stranded fringe. You can also use a hook to pull the loops through and then thread the long fringe through the loop and pull the tight to create the knot. If Knitting is Hard (just in case) Insert your crochet hook through a loop on the edge of the mug rug, starting from the back of the work. Next, grab the loop formed by folding the strands of yarn. Use a hook that is large enough to catch the yarn and pull it through the loop. Always pull the fringe loop through from the same direction so the knots all match Enlarge the loop you have pulled down so it is big enough to bring the long strands down and thread them through this loop. Pull the loop tight and move onto the next fringe. When you have the fringes done on each edge of your crochet cup mat, you can trim the fringe to the preferred length. This is up to your individual taste. Finishing On the Edges Common Mistakes to Avoid Tips for Maintaining Your Handmade Mug Rug To keep your crochet coasters in top shape, it’s important to wash them properly. Hand washing is usually the best method. Use mild detergent and warm water. Gently swish the coasters around and avoid wringing them out, as this can distort their shape. Rinse thoroughly and press out excess water with a towel. Lay them flat to dry, reshaping them as needed. Proper storage can extend the life of your crochet coasters. Store them flat in a dry place to prevent them from becoming misshapen. If you have multiple coasters, stack them neatly. You can also place a small weight on top to keep them flat. What Yarn is Best for Mug Rugs? For making mug rugs, it is best to use tough and easy-to-wash yarn like cotton or acrylic. These materials last well, even with lots of use and washing. Also, pick a yarn thickness that matches how you want your rug to feel and look. If you cannot find the right thickness, you can always crochet two or three strands of yarn together to get the thickness you want. How Big Are Mug Rugs? Mug rugs come in different sizes, but they are usually smaller than placemats and bigger than coasters. They can be about 4 inches by 6 inches (10 cm by 15 cm) to 8 inches by 10 inches (20 cm by 25 cm), but it depends on what you like and what you are using them for. Some people like smaller ones because they are
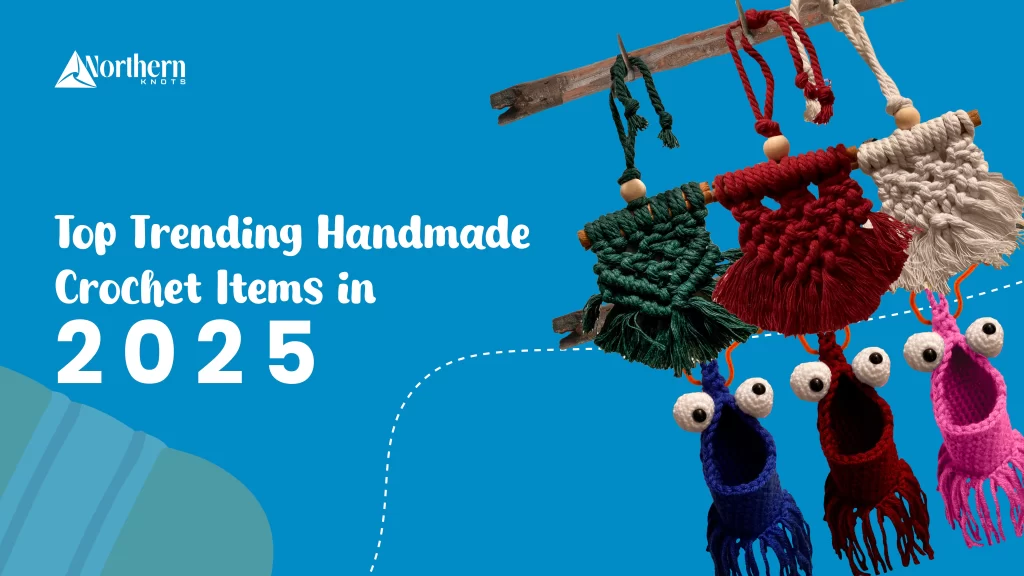
Whether you are someone who loves to stay on top of trends or just curious about where crochet craft is heading, we have collected all the top crafts that are unique and can be used as decorative items. You can also gift these handmade creations to stay cherished by your loved ones. If you are someone who loves crocheting, then we hope these trends spark your creativity and inspire you for your next crochet project. Let’s explore all the trends in categories and see what’s hot in the world of hook and yarn! Home Decor Crochet Creations If you are looking for unique and personalized crochet creations that brighten up your home, then these items are SOARING! 1. Artisan Wall Hanging Artisan wall hangings are eco-friendly and add a personal touch to your walls. This decor hanging features colorful macramé feathers crafted with natural yarn. These are created with a series of cords onto a wooden dowel to form a base, then the feathers are shaped to create a dense pattern. Unlike any other wall hanging, it is easy to install/uninstall, fits in small spaces, can be used indoors or outdoors, and can even be used all year round as a decorative wall art feature. And it is a must-have! 2. Crochet Hand Towel Towels are important for personal hygiene, and some towels made of rough materials can cause skin irritation, which is really bad! Since handmade towels are always out of stock because everyone prefers to have something real, you can save one for yourself at Chaotic Creations. Unlike the towels that are produced in mass quantities, our crochet hand towels are crafted with care, and they hold a special story behind them. 3. Crochet Kitchen Towel When you think of a kitchen towel, you must think of the thin linen that your grandma once used back in the day, but what is even worse than having vinyl prints on your kitchen towels? These prints can easily melt when they are exposed to heat and hinder the drying process. Thankfully, you don’t have to go through a similar headache when you purchase our crocheted kitchen towels. Because the one we make quickly eases up your every cleaning drying task for you. Plus, they are made up of original cotton yarn and won’t hold any dirt or stink as long as you keep washing them. These handmade crafts serve as pot holders, trivets, and oven mitts to protect your hands. Moreover, their multi-purpose nature makes it valuable to be in the kitchen, saving both your money and your time. 4. Crochet Plant Hangers Crochet hanging plants not only add beauty and freshness to a place but also indoors; hanging plants don’t take up floor space or tabletops. You can keep them out of the reach of curious kids and pets. The best thing about these plant hangers is that they add great color and drama to boring corners or awkward spaces in your home. These plant hangers are amazing especially if you’re looking for something to fill window boxes or want something to get displayed, like a colorful collection of patio plants. 5. Rectangle Granny Square Blanket A handmade blanket’s ability to keep you warm is fundamentally linked to its material and construction, which collectively form an insulating barrier that traps body heat. We all know how cruel winter can get sometimes, and we are left with unhappy cold feet in bed for the rest of the night. With our crocheted granny square blanket, you can save you from big electricity bills by keeping your bed warm because no one likes to climb icy sheets after a long day. This blanket is made up of 100% cotton yarn, which is better than retaining heat, and they are sumptuously soft for a soothing night’s sleep. They are a must-have to keep you cozy throughout the night. 6. Crochet Baby Blankets Every new parent should equip themselves with at least one baby blanket because they keep their little one warm and comfortable. Introducing your kids to handmade crochet blankets not only creates an attachment, but they feel a sense of security every time they sleep. These cozy companions provide warmth and wrap your children in comfort. These blankets help them sleep well and keep the scary dreams away. They are soft and made up of premium yarn to form a feeling of cuddles. Your baby requires sweet naps, and getting one of these blankets will only provide you with so much-needed peace of mind. Thoughtful Handmade Gifts for All Occasions Surprise your loved ones with unique handmade, unique crochet gifts that show care and creativity. 1. Emotional Support Poptart Crochet Pop Tart Pals are delightful handmade toys designed to capture children’s imagination and creativity. With their vibrant colors and charming designs, these pals offer a screen-free play option, allowing kids to engage in imaginative storytelling and role-playing adventures. They can become fun companions during playtime, which fosters creativity. These toys provide a sense of comfort for your children. Their gentle textures are ideal for little hands, and these companions are there when they need a hug. Also, these pop-tart pals are sure to bring a smile to anyone’s face. Their playful personalities and friendly demeanor will make this emotional support your new favorite instantly. 2. Handmade Gnome Ornament These charming little creations are not only visually delightful but also encourage imaginative play. Handmade Gnome Ornament brings a whimsical touch to any surroundings. Their playful presence adds charm to mantels, shelves, or holiday displays, making your environment more inviting and vibrant. Integrating them into your space can create warmth and positivity while promoting sustainable and meaningful decor choices. 3. Handmade Keychains Handmade keychains are always considered “cool.” And macrame keychains have become a part of the trend for everyday use. Your keys will never be lost with these handmade keychains that are pocket-friendly and come in many designs and colors. These keychains can also be personalized with different knots, beads, and tassels,
Finding the right kitchen towels can be a struggle. They are either too flimsy, do not absorb well, or they lack any character. Crochet hand towels solve all of these issues. They are not just practical, but are made from durable, absorbent materials like cotton. The cotton makes sure they perform well for drying dishes, wiping up spills, and adding a personal touch to your kitchen. However, making your very own crochet towels is an affordable and rewarding way to update your space. If you are willing to invest a little time and patience, this simple project will give you both beauty and function in your kitchen. Why Choose Handmade Kitchen Towels? Kitchen towels that are crocheted by hand can be a great way to make your kitchen feel like home and help the environment. Making a crocheted towel involves making something that is both practical and strong, and it can be used for different tasks such as drying the dishes, cleaning hands, and cleaning up minor accidents in the kitchen. Not only are crocheted towels more effective than those that are store-bought, but you can also select your needed materials and patterns that will complement the colors and themes of your kitchen. How to Make a Crochet Kitchen Towel & the Tools You Need The very first step in crocheting your kitchen towel is to collect a few basic tools and materials. This is what you shall need to begin: Crocheting Tools and Materials Yarn Make sure to go for yarn that absorbs water and it is also strong enough to withstand wear and tear. Cotton is the best choice for crocheting towels as it is highly absorbent, soft, and is easy to work with. Crochet Hook The choice of the crochet hook is determined by the yarn that you choose. A good size to start with for most cotton yarn is a 5.0mm or 6.0mm hook. Scissors Scissors for cutting the yarn. Tapestry Needle Tapestry Needle for weaving in the ends after finishing your crochet towel. Basic Crochet Stitches The chain stitch (ch), slip stitch (sl st), single crochet (sc), and half double crochet (hdc) are the most common stitches you can use to crochet kitchen towels. They are all easy to learn and great for beginners. Why Do We Use Kitchen Towels? Kitchen towels are a must in every home. They serve multiple functions, including: Drying Dishes Cloth towels in the kitchen are the best tool when you need to dry your dishes, utensils, and cups right after washing them. Cleaning Spills They help to quickly clean up spills or wipe down counters and tables. Hand Towels Hand towels, especially those which are made of crocheted material and are usually hung on toaster racks or hooks on the wall, are the perfect item which can be used for drying wet hands. Decorative Pieces Handmade towels can also be used as decoration in the kitchen by adding texture and color, updating its look. On top of being functional, crochet kitchen towels are eco-friendly, reusable, and a great way to reduce waste by eliminating disposable paper towels. How to Use Handmade Crochet Towels Once you’ve completed your beautiful crochet kitchen towel, it’s time to use it! Here are some ideas on how to make the most out of your handmade towel: Hang it by the Sink Crochet handmade towels can always be hung on hooks or towel racks by the sink, and they provide easy and quick access for wiping and washing the dishes and cleaning up the place. Use It as a Hand Towel Crocheted hand towels are perfect for drying hands after washing them in the kitchen or bathroom. Gift it Crocheted handmade towels are wonderful, considerate presents for friends and family. Pair it with a matching potholder or dishcloth for a lovely homemade set. Crochet Hand Towel for Beginners If you are new to crocheting, a crochet hand towel is a great beginners project. Here is a simple step-by-step guide for creating your first crochet kitchen towel: Start with a Foundation Chain Begin by making the chain, with a row of about 30-40 stitches, depending on the width as desired. Work in Rows Turn your work and start crocheting in rows. You can also use a half double crochet for a very simple textured fabric. Or, you could choose a double crochet of the same color to give an additional texture. Continue Until Desired Length Keep crocheting until your towel becomes the length you wanted. You would also be adding a decorative border to the towel by putting slip stitches or single crochets along the edges. Finish and Weave in Ends Once you are happy with the size, finish off the work by cutting the thread and then using a tapestry needle to weave in the loose ends. This simple pattern will allow you to make a soft, absorbent towel that you can use in your kitchen or bathroom! Frequently Asked Questions Q: Can I use any yarn for crocheting kitchen towels? A: It’s best to use cotton yarn for kitchen towels, as it is highly absorbent, durable, and washable. Q: How do I ensure my crochet towel is absorbent enough? A: The key is to use cotton yarn and to crochet with tight stitches to create a more solid fabric. Make sure you use a suitable yarn weight and gauge. Q: Are crocheted kitchen towels machine washable? A: Yes! Cotton yarn is machine washable, making your handmade towels easy to care for. Just wash them on a gentle cycle and avoid fabric softener to preserve absorbency. Q: How long will it take to crochet a kitchen towel? A: The time will depend on your skill level, but most people can complete a simple kitchen towel in a couple of hours, especially if it is their first time.
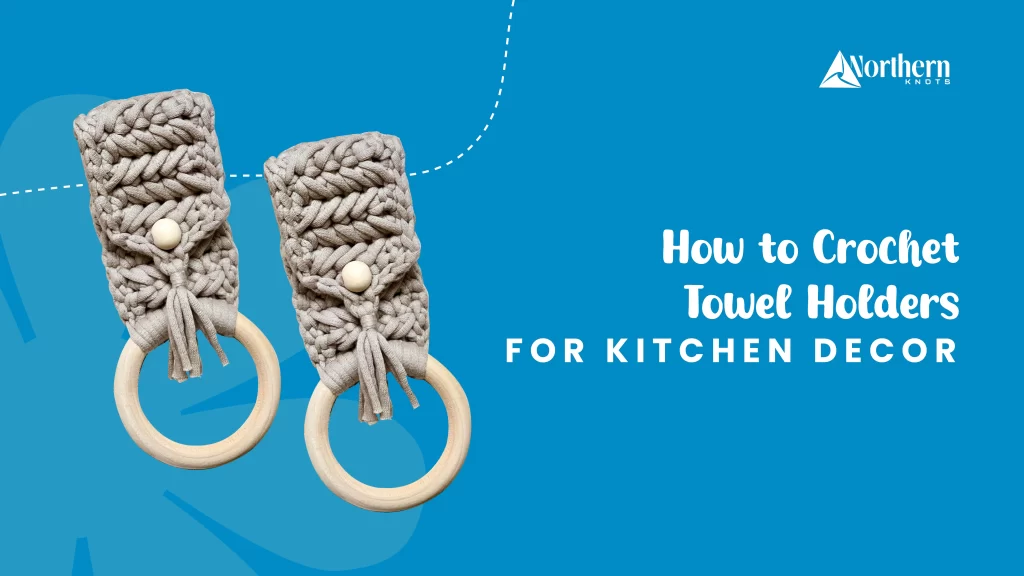
Crocheting is a beautiful form of creativity that adds a unique charm to any space. It’s not just a craft but a gesture that brings a sense of tranquility and warmth. If you’ve adorned your home with crocheted decor, you’ve experienced the peace they bring. Now, let’s embark on another simple yet inspiring project: a crochet towel holder. We all know the frustration of a kitchen essential falling to the floor. The worst part comes after it, which is using that towel to clean your hands or dishes. That’s where a towel topper or ring comes in, providing a convenient spot to hang your towel. This simple tutorial on crocheting a towel topper is here to make your life easier. What is The Purpose of a Crochet Towel Hanger? A crochet kitchen towel holder is an object that fuses fashion with functionality in a way that store-bought items simply cannot. It keeps your kitchen towels in order and decorates your kitchen with your own personal touch. They can really be very handy for holding up towels and not letting them drop on the floor. Things You Need When Crocheting Towel Hangers Before you start, ensure that you have the following: How to Crochet a Simple Towel Holder If you’re new to crochet, this is a great project to start with! It’s simple, forgiving, and uses just a few basic stitches like the single crochet and slip stitch. Follow these easy steps to create a practical and stylish towel holder for your kitchen. Step 1: Create The Towel Loop Let’s begin with how you would like your towel to be held with the holder. A loop-style holder is easy to make and handle because you can easily slide the towel in and out. Step 2: Create a Foundation Chain Begin with a slip knot. Create it using your yarn, leaving a 6-inch tail. Put the loop on your hook and pull it tight. Then, yarn over (wrap the yarn over your hook) and pull it through the loop on your hook to make a chain stitch. Make 25–30 of these. The loop size will depend on the handle thickness you want. Stick to 25 for thinner handles, and for thicker rods or hooks, go up to 30 or more. Now that the chain is formed. Lay it flat to ensure it isn’t twisted. A twisted chain can make your project uneven. Step 3: Crochet Rows Skip the first chain next to your hook (this is your turning chain). Insert your hook into the second chain, yarn over it, and pull through the chain. You’ll have two loops on your hook. Yarn over again and pull through both loops. That’s your first single crochet stitch! Continue all the way across the chain. Once you have worked the last single crochet stitch across, chain one, turn your work so that you can start working in the opposite direction. Now, continue with the single crochet stitches across every row. Repeat for about 3–4 rows until your strap feels strong enough to hold a towel. Step 4: Form The Loop Fold your strap in half to create a loop. Then type the ends. You can slip-stitch the two ends of the strap together. Hook your hook into a stitch from one end of the strap and then into the matching stitch on the other end. Yarn over, pull both stitches through, then pull through the loop on your hook. Repeat until the ends are entirely tied together. You can add a button here and leave the other end open. Optional Tip: Join the ends at one point or add a button. Leave an end open, skip a couple of stitches back in the row, and sew on a button to make a buttonhole. Then, end with an easy-to-use open-and-close connection. Step 5: Add The Final Touches Add an extra decorative step to your towel holder by completing a picot border. When the loop is complete, chain three, slip stitch in the same stitch, skip one, and repeat. You can also crochet your towel and the topper over a wooden ring. It looks adorable and adds a sleek touch to the final project. Start by making a slip knot on the ring. Then, work single crochet stitches all around the ring to completely cover it. Sew or use slip stitches to attach the wooden ring to your strap. Step 6: Hook The Towel Next, fold your towel, slide it through the final loop, and pull the towel through it nicely. Your crochet towel hanger is ready now! You can customize it to your liking, like adding colors using different yarns or adding any other embellishments you like. Grab your hook and yarn and start creating a practical yet beautiful addition to your kitchen today. With just a little effort, you’ll have a handmade piece that’s useful and uniquely yours! Frequently Asked Question 1. Can I use leftover yarn for this project? For sure! Grab all of the leftover yarn and start crocheting. Towel holders are the best projects for using up scrap yarn. Stay evenly consistent throughout the process, and knot every end tightly with the next start. You will be left with a funky towel hanger that you will love at the end! 2. How do you attach the towel to the holder? The easy way is to slip the towel through the loop; otherwise, you can sew the holder right onto the towel with a tapestry needle. Or you can also crochet it with a wooden ring to add a vintage vibe to it. 3. What should I do? My towel holder stretches out. You need to stay firm with the stitches and keep them tight. High-stress areas like loops and buttonholes will remain unbent and not stretched. Remember to trust the process and continue with consistency. 4. Are crocheted towel holders long-lasting? Yes, crocheted towel holders are very long-lasting when made of good-quality yarn, and proper techniques can be followed. Even if
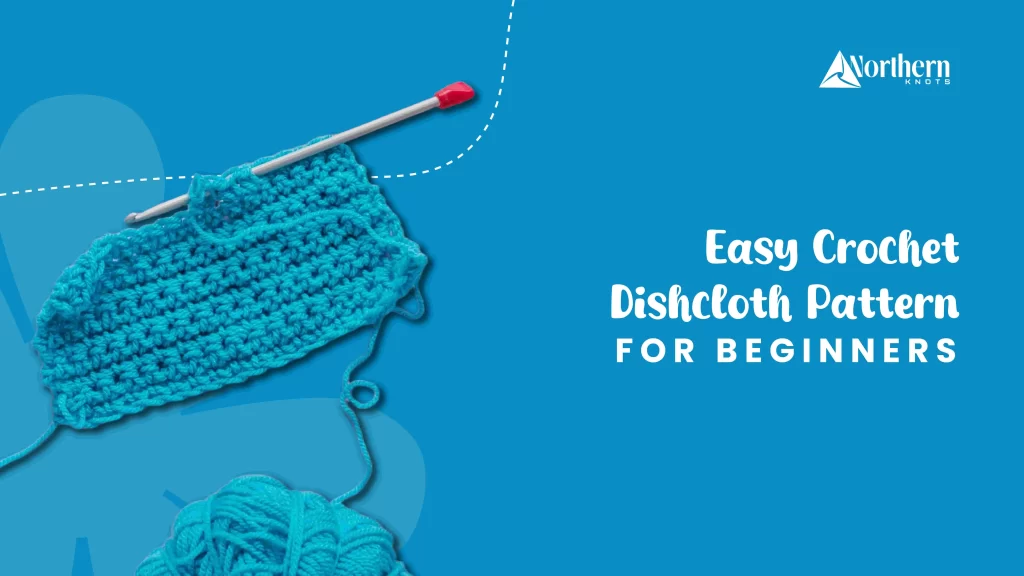
Are you tired of your dish towels that leave your dishes damp and streaky? The tidiness of kitchen utensils is something we all value. When your dishes are spotless and gleaming, it’s almost therapeutic to spend time in the kitchen, all soaked up in the beauty and radiance. You can achieve that level of cleanliness and the best part is that with the help of hook and yarn, you can create a crochet dishcloth that wipes it all down for you and is easily washable. What is a Dishcloth? A dishcloth is a small, square cloth used for washing dishes, cleaning surfaces, or wiping up spills. First, let’s go over the stitches and materials as well as the steps to create a crochet hand towel. Stitches Materials Make a Slip Knot First Create a Crochet Chain The first step to starting your crochet dishcloth is making a foundation chain. Don’t worry, it’s quick and easy! Everyone holds their yarn differently, so find what feels best for you. Drape the yarn over the index finger and hold it lightly between your index and middle fingers. Then use your thumb and ring finger to steady the yarn’s loose end. With your slip knot already on your hook, it’s time to make your first chain stitch. To do this, simply loop the yarn over the hook (called “yarn over”) and pull it through the loop on your hook. For this beginner crochet dishcloth, you will need to make 32 chain stitches as the base. Crocheting a Dishcloth Comes in Three Different Steps It is important to learn three different stitches for your own ease. It isn’t complicated at all, so don’t worry about it; they are just stitches built upon each other and once you learn to do a single crochet, it will be easy for you to learn double or triple crochet. How to Single Crochet After chaining your 32 stitches, turn around your work and start working in the other direction. You will now be going into the single-crochet chain and you can also make an entire dishcloth from a single crochet chain but it gives a nice tight weave. To single crochet, you simply insert the hook, with the loop on it, into the first chain after turning your work. Next, you hook the yarn and pull it through the chain; you will then have two loops on your hook. You then hook the yarn again and pull it through the two loops. You have completed a single crochet stitch. For this simple crochet dishcloth, you will complete four rows of single crochet. Each time you turn in your work, you need to chain one between rows. Then, work into the first stitch. How to Double Crochet After completing four rows of single crochet, it’s time to make one row of double crochet. First, chain three and turn your work. Wrap the yarn around your hook once. Next, insert the hook into the next stitch, yarn over to grab the yarn, and pull it through. You will have three loops on the hook. Yarn over again and pull through two of the loops. Yarn over one more time and pull through the last two loops. You have now finished a double crochet. Continue this across the entire row. How to Triple Crochet After completing your work, you will have four chains. Wrap the yarn around your hook twice, insert it into the next stitch, and pull the yarn through, resulting in four loops. Yarn over and pull through the first two loops (three loops left), yarn over again and pull through the next two (two loops left), then yarn over and pull through the last two. You’ve completed a triple crochet. Work the triple crochet all the way to the end of the row. When you reach the end of the row, chain three and turn your work. You will now do another row of double crochet. Free Dishcloth Pattern Here is a quick and easy dishcloth pattern review that’s both practical and fun to make! Does Handmade Dishcloth Clean Well? YES! Everyone prefers handmade crochet dish cloth and it just feels good to wipe the dishes and the counters with something handmade, right? It’s not just about cleaning; it’s about adding a touch of effort and care to your daily routine, knowing every stitch of this crochet kitchen towel was made with love! Now that you know what stitches you’ll need to know, all about the yarn and the basics of what we’ll be crocheting, you can get started on this easy crochet dishcloth pattern! Remember, take your time, read the pattern thoroughly, and practice as much as you can. Now all that’s left to do is grab your crochet hook and yarn something unique for yourself or your loved ones. Frequently Asked Dishcloth Questions Store bought crochet hand towels are great too, but there is an obvious beauty in dishcloths that are handmade and without the help of machines. You can even add a strand of scrubby yarn along with the cotton yarn to make an extra-thick crocheted dishcloth. Avoid cutting the yarn too close to the knots, as this can cause it to unravel over time. Additionally, ensure your stitches are tight and consistent, especially around the edges, to keep the dishcloth durable during use and washing. A crochet hand towel can be washed with the rest of your laundry. When in use, be sure to ring out the dishcloth really well to avoid any musty smell. Absolutely! Dishcloths are a perfect project for using up leftover yarn. Just make sure all the yarns used are of similar material (preferably cotton) to ensure consistent texture and durability.
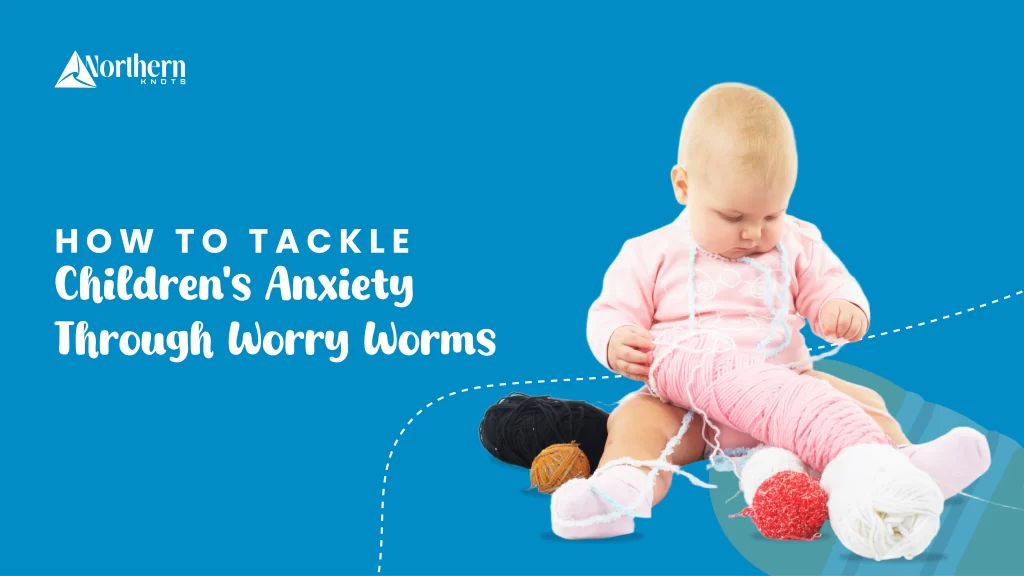
One of the hardest things about anxiety, especially for kids, is figuring out how to talk about it. Big feelings like worry can feel so jumbled up and to put them into words seems impossible. Worry Worms works as adorable, squiggly little helpers to throw anxiety out of your mind and into the open where you can see them, talk about them, and even laugh at them. They might be cute and cuddly but they’re a creative and fun way to deal with the big emotions. These worms can give kids a fun, creative way to express their worries without feeling pressured to explain everything out loud. Let’s find out why they’re such a brilliant way to help kids feel calmer and more in control! What Is a Worry Worm Used For? When we let our worries sit inside our heads for too long, they can feel like they’re growing bigger and scarier. Worry Worm works as your tiny, pocket-sized buddy who’s always ready to listen. Kids can write down their worries on a little note and tuck it away with their Worry Worm. This simple act of sharing your concerns can make those worries feel a whole lot smaller. Some parents and teachers even use Worry Worms as part of a calming routine to help kids talk about their feelings in a safe, fun way. Worry Worms are often handmade and sold online or at local craft fairs. They come in all sorts of colors, shapes, and sizes, so you can pick one that feels just right for you or your child. Some sellers even include inspiring notes or tiny envelopes with each Worry Worm, making them feel extra special. You can check worry worms for sale out from stores online. Let it wiggle its way into your life! How Children Visualize Anxiety Through Worry Worms Visualizing anxiety can be tough, especially for kids, because worries often feel invisible and hard to describe. In this scenario, Worry Worms works because it’s a gentle, non-judgmental way to externalize emotions. Instead of feeling stuck inside their worries, kids get to see them, hold them, and even laugh at them. And when something feels less scary, it’s much easier to talk about it, face it, and eventually let it go.They come in, as a creative and fun bridge between what you’re feeling inside and what you can see and touch outside. 1. Giving Your Worries a Physical Form Anxiety can sometimes feel like a giant storm swirling around in your head but with the use of a Worry Worm, you’re giving that storm a shape. You can write down your worries on a small note or a scrap of paper, fold it up, and place it near your Worry Worm. Suddenly, that invisible worry now has a physical presence, making it less mysterious and more manageable. 2. Using Texture to Express Emotions Worry Worms often come in bright, cheerful colors, but you can also find or make ones that reflect how you feel. Maybe a soft, pastel worm helps you feel calm, or a bold, fiery red one matches a more intense feeling. The textures of these crocheted items are fuzzy, squishy, or smooth and can also offer a tactile experience that soothes your nerves while symbolizing your emotions. 3. A Safe Space for Your Worries When you share your worries with a Worry Worm, you’re essentially giving those feelings a “home” outside your mind. Some kids like to keep their Worry Worms in a special pouch, jar, or drawer. Every time they feel overwhelmed, they can revisit their worms, read their notes, or even talk to their worms about what’s bothering them. This makes anxiety feel like something you can handle one small piece at a time. What are the Perfect Occasions for these handmade gifts? 1. Back-to-School Season Heading back to school can be nerve-wracking for kids (and even parents!). New teachers, new friends, and the pressure to keep up can stir up a lot of anxiety. Gifting a Worry Worm during this time can be a sweet way to remind kids they have a little buddy to help them through those first-day jitters and beyond. 2. Birthdays Worry Worms also make the perfect handmade gift for birthdays. These fun toys can make birthdays super special and meaningful. Get a colorful Worry Worm tucked into a gift bag and send it to the birthday child. This will show how much you care about their happiness and their feelings. 3. Exam Time or Big Events Kids often feel overwhelmed during exams, recitals, or sports competitions. A Worry Worm can act as a comforting token, reminding them they’re not alone and encouraging them to breathe and take things one step at a time. 4. When Someone’s Feeling Down A Worry Worm can be a small but meaningful gesture to lift their spirits especially for someone who is having a bad day, a fight with a friend, or just feeling anxious for no reason. 5. Christmas or Other Holidays Worry Worms make amazing stocking stuffers or thoughtful additions to holiday gift exchanges. They’re small, personal, and bring a little extra warmth and love to the season. 6. As a “Just Because” Gift Sometimes the best gifts are the ones you give for no reason at all! A Worry Worm is perfect for those random moments when you want to let someone know you’re thinking about them. Bring this comforting buddy, a trusted listener, and a tiny source of daily encouragement to your home and see for yourself how this cute little keepsake removes all your worries!
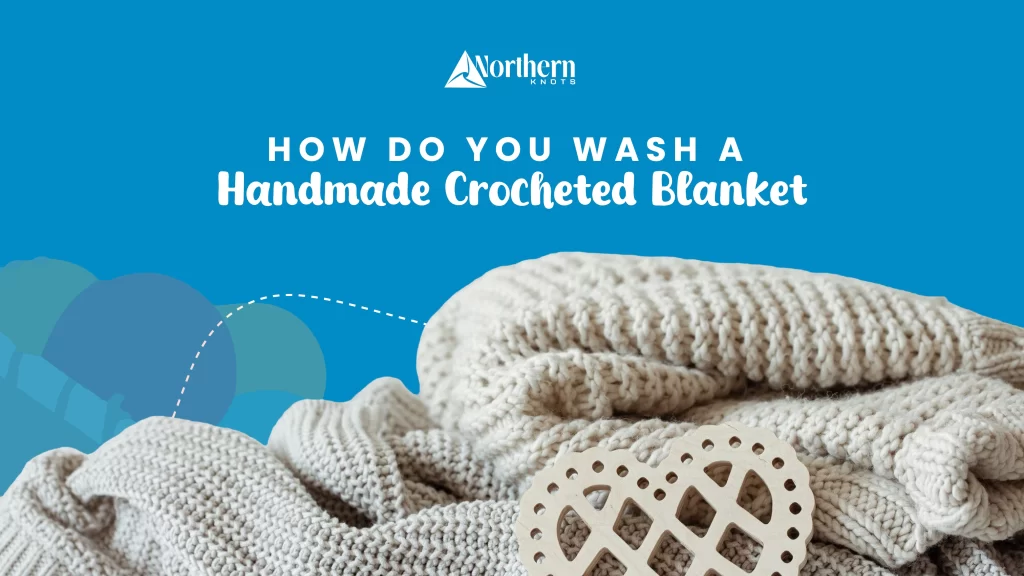
Crocheted blankets are like a snuggly hug for any room, instantly making it feel warmer and more inviting. These blankets bring a little extra charm to your space, no matter where you got them from. But, like anything you love, they deserve some tender loving care to keep them looking great for years to come. However many people don’t know the right way to wash handmade crocheted blanket. Most of them don’t know the right techniques that can keep these blankets fresh and fluffy. Check the Yarn Care Instructions Before starting the washing process, it is important to check the care instructions for the yarn that you used in your handmade crocheted blanket. It is not enough simply to wash different fibers in the same washing condition, as their needs are different. Therefore, you should be well-informed on whether your blanket is made of wool, cotton, acrylic, or a blend. It usually is the occasion that yarn labels have directions for machine washing, hand washing, drying methods, and temperature settings. If the blanket was a handmade gift, you can often ask the creator for advice on care instructions. Test for Colorfastness To keep the colors from bleeding, especially if the handmade crocheted blanket is brightly colored or uses multiple shades, it is a good idea to test for colorfastness. You can do this by dipping a small, hidden area of the blanket in cold water with a bit of mild detergent. Let it sit for a few minutes, then rinse. If the water runs clear, you are good to go. If the dye runs, you may need to hand wash the blanket separately or use a color catcher sheet. How to Wash Your Crocheted Blanket Once you are familiar with the yarn type and tested the colors, you can decide whether to hand wash or machine wash your handmade crocheted blanket. Both methods are effective, but the method you choose depends on the blanket’s size, the yarn type, and personal preference. Hand Washing Method Hand washing is the gentlest way to clean a crocheted blanket, especially for delicate yarns like wool or alpaca. Machine Washing Method If your blanket is made of durable, machine-washable yarn like acrylic, you can use your washing machine, but it is important to be cautious. Drying Your Crocheted Blanket After washing, drying your handmade crocheted blanket properly is just as important as cleaning it. The wrong drying method can result in shrinkage, misshaping, or damage to the fibers. Air Drying (Preferred Method) Air drying is the best way to save the shape and texture of your blanket. Avoid using a tumble dryer, as the heat can cause damage to the fibers. Using a Dryer (For Acrylic and Durable Yarns) For blankets made of acrylic or other synthetic fibers, you may be able to use a tumble dryer on a low heat setting. Storing Your Crocheted Blanket Once your handmade crocheted blanket is washed and dried, proper storage is important to keep it looking its best. If you follow proper care instructions, then your crocheted blanket will be a constant source of warmth and joy in your home. The above cleaning way if followed can make your crochet blanket clean, fresh, and intact for years.
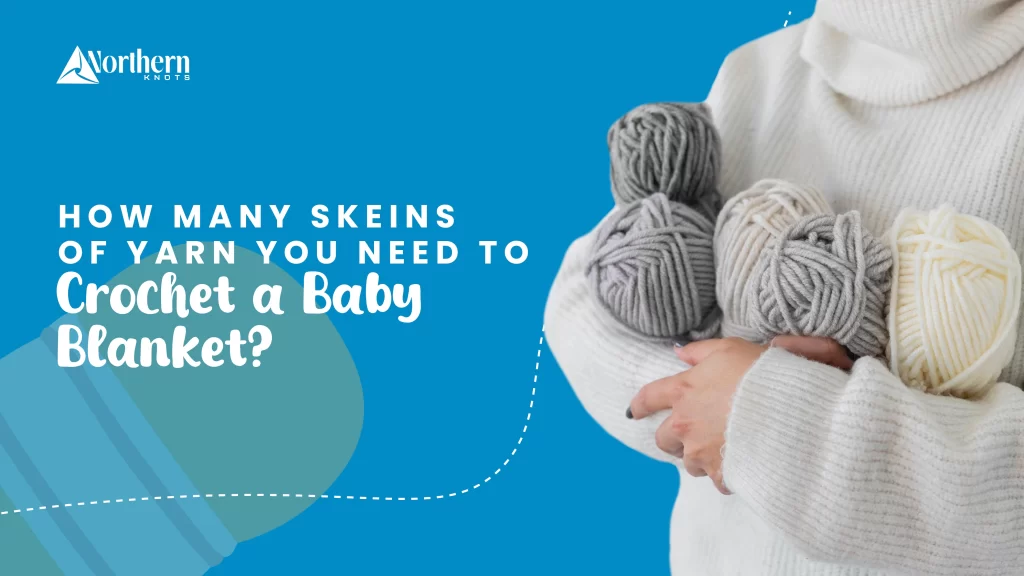
This heartwarming gift project is for new mommies, grandparents, or anyone looking to create something unique for their loved ones. However, one of the most common questions from the new mommies is how to crochet a blanket for their baby, what the right size for a baby blanket is, and how many yards of yarn in a skein is. Whether crochet a weighted blanket to give the baby a cozy feeling. These questions alone can be intimidating enough for a person to step back. But Northern Knots heart-warmingly explains this step by step so that you can easily crochet a beautiful baby blanket. How Much Yarn Do You Need to Crochet a Baby Blanket? This is the amount needed to crochet the best yarn for a baby blanket, which depends on the size of the baby blanket, the type of yarn used, and the crochet pattern. However, it’s important to keep in mind these are just rough estimates. The yardage of yarn that one will actually need has a little bit to do with the type of stitch pattern and how thick the yarn is. The chunky yarn needs much fewer yards than light yarns. So remember to take all these factors into account whenever you start planning your project. How many yards of yarn in a skein? Yarn is sold in skeins or balls. It depends on the yardage per skein and how many you will require. For example, it will take about 4 to 6 skeins of worsted-weight yarn to make a medium-sized baby blanket crochet, depending upon the skein and the yarn, which will run around 200 to 220 yards per skein. However, bulky yarn, with about 100 to 120 yards per skein, may require 10 to 12 skeins for the same-size blanket. Always check the label on your yarn for the exact yardage. Most crochet patterns contain detailed yarn requirements, including how many skeins you buy. Choosing the Right Yarn for a Baby Blanket Choosing the best yarn for a baby blanket is very important because it has to be soft, safe, and durable. Babies have sensitive skin, so look for yarns labeled baby-friendly. These include soft and non-irritating materials like acrylic, cotton, or bamboo blends, The other factor to consider is washability. Babies are messy creatures, so selecting a yarn that allows for machine washing would be great. Acrylic yarns are also excellent because they are strong, inexpensive, and come in various colors. Natural fibers, such as bamboo and organic cotton, are also fantastic for babies with sensitive skin allergies because they are generally hypoallergenic. How Big Should a Baby Blanket Be? It will also depend on the baby blanket’s use and its age. A receiving blanket that is 30 by 30 inches is very suitable for swaddling and for light coverage at birth. For infants, it can be around 36 by 36 inches, and it can double as a play mat or a stroller cover. For toddlers, a size similar to 36 by 48 inches is great for napping or to serve as a security blanket. Size would also consider its practicability. A small blanket will be easy to carry and useful for several purposes when the baby has grown up. If a blanket is going to go in a particular place, such as a crib or in the car seat, then its measurements should be taken into consideration for fitting purposes. Tips on Crocheting Your Baby Blanket It is exciting when a beginner starts with very simple designs as they are starting their crochet project. Here are some useful tips for beginners: End on a soft finish The most useful stitches one can add to baby blankets are either single crochet stitches or double crochet stitches, and these will give the finished blanket a firm yet soft finish. Stick to such foundational stitches if you are a first-time crocheter as you become comfortable with the process in its entirety. Opt for funky colors Plan your color scheme ahead of time to ensure that your crochet rectangle blanket isn’t a jumbled mess. Soft pastels or neutrals are popular picks for baby blankets, but don’t be afraid to get bold or multi-colored to make your project stand out. Choose the right hook size The hook size is important to ensure that the desired texture and drape are achieved. Most yarn labels will indicate the recommended hook size. A larger hook will result in a looser, softer blanket, while a smaller hook will produce a denser, warmer fabric. It is always a good idea to test your gauge before starting the project. Crochet a small swatch to determine if your stitches match the pattern’s requirements. Add a decorative border Adding a decorative border can give your baby blanket a more polished finish. Scallop or picot edges are easy to crochet and add an element of class to your finished project. It can also help to increase the weight of the blanket. Conclusion Making a baby blanket is more than making a functional product; it is a labor of love. Knowing how many yards of yarn in a skein you will use can help you easily with the whole crocheting process. Choosing the best yarn for baby blanket, size, and design can create a keepsake that will be treasured for years to come. Whether you’re making a lightweight receiving blanket, a playful toddler cover, or a crochet weighted blanket, the process is as rewarding as the finished product. Enjoy every stitch, and remember—your handmade blanket carries the warmth of your motherhood effort and care. Handmade items hold a special place in the heart, and while you watch your baby grow, the memory will be cherished over time.
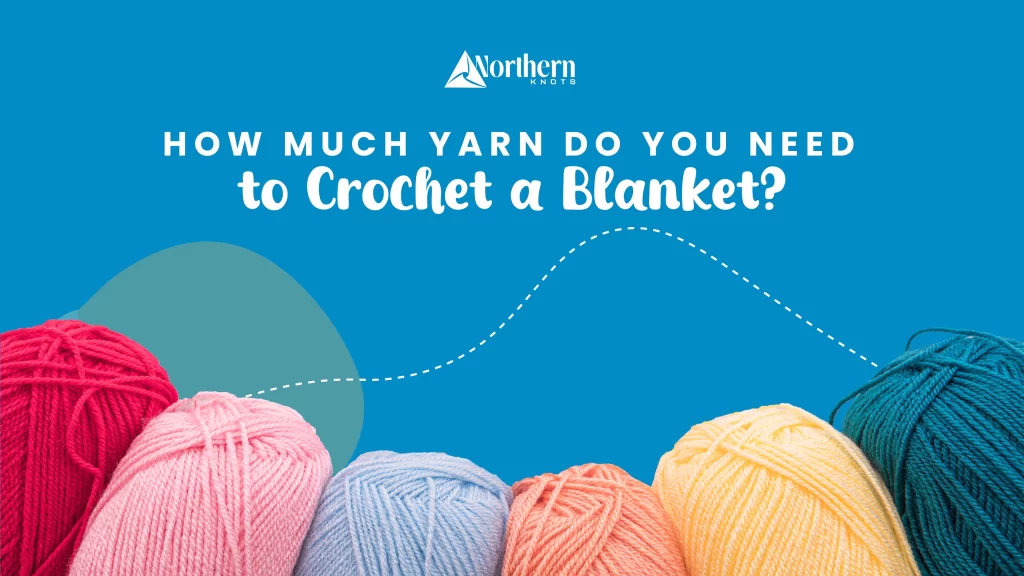
Crocheting a blanket is one of the most comforting and rewarding projects you can undertake. The rhythmic motion of the hook and yarn as you stitch together makes the entire creation process heartwarming. Before people start crocheting, they need to know how much yarn they need to crochet a blanket. This is essential, especially when creating soft, warm throws for your couch, a snuggly weighted baby blanket, or a luxurious crochet-weighted blanket. Remember that all yarns come in various types, weights, and fibers, and the amount you’ll need can vary significantly based on the size of your blanket, the yarn you choose, and the factors that influence yarn amount. Factors That Influence Yarn Amount There are several factors that influence how much yarn you need for your crochet blanket: Firstly, it’s the size which determines how much yarn you need. It could be a small lapghan, a cozy throw, or a full-size bedspread, the dimensions of your project will dictate the yardage you’ll need to knit anything. Yarn weight plays a big role in how much yarn you need. Thicker yarns, such as bulky or super bulky yarn, will require fewer yards than finer yarn, like fingering or sport weight. Different crochet stitches require different amounts of yarn. For example, a simple single crochet stitch uses more yarn than a double crochet stitch. Patterns with intricate stitches, like the chevron stitch or granny squares, can also impact the total yarn requirement. Every crocheter has a unique tension, meaning the tightness or looseness of your stitches. If your tension is looser, you may need more yarn to reach the intended size. Always check your gauge to avoid running out of yarn mid-project. How Much Yarn Do You Need for Different Blanket Sizes? Here’s a breakdown of yarn estimates for standard blanket sizes based on different yarn weights. These are rough guidelines to give you a starting point: Of course, these are rough estimates, and your specific project might require more or less yarn, depending on the abovementioned factors. If you’re unsure, buying a bit of extra yarn is always a good idea. You don’t want to get halfway through your crochet weighted blanket only to discover you’re short! How Can I Choose the Right Yarn for My Blanket You need high quality yarn for crochet. The yarn you choose will influence your crochet blanket’s feel, texture, and durability. Here are some options for different types of yarn that can be used to create beautiful blankets: Top Picks for Best Yarn for Crochet in 2025 Choosing the right yarn can make a world of difference when crocheting blankets. Whether you’re crafting a cozy throw, a soft baby blanket, or a chunky weighted crochet blanket, the yarn you select will set the tone for the final result. Here are some of my favorites that I can’t recommend enough – each with unique qualities that make crocheting a dream! With so many amazing yarns, you’ll find one that ideally fits your crochet needs. The most in-demand is I Love This Yarn! From Hobby Lobby. It’s been an absolute favorite for many reasons. The main one is its worst weight, which is made from 100% acrylic. The best part is that it doesn’t glide smoothly on clover hooks and is super easy to wash and maintain. Now, coming to get the price, you get 252 yards per skein for just $4.99! They’ve been putting 30% off yarn sales every other week. This christmas, that might’ve put something big. Make sure to check their website. 2. Lion Brand Yarn Lion Brand Yarn is another emerging brand, but yes, the price of $51.99 can raise some eyebrows. Their best is the cover story yarn, which is bulky and comes with 547 yards per skein. This one skein is enough to complete an entire full blanket. You can make an entire 36″ x 46” blanket with just one ball – yes, the yarn is vast! You’ll often find it on sale at Joann Fabrics and Lion Brand’s website, so look out for deals. 3. Yarnspirations Yarnspiration is a fan favorite. It’s hands down the bulkiest yarn, perfect for making soft, squishy blankets. The yarn is 100% polyester, so it’s soft yet durable. With more than 100 color options, you’ll have no trouble finding the perfect shade for your project. Their new collection features vibrant, playful colors perfect for spring or creating fun, bold designs. If you love creating statement pieces, this yarn is perfect for crochet projects like throws, scarves, or blankets with eye-catching color combinations. Yarnspirations constantly updates its offerings, so checking out its new arrivals is a great way to discover fresh, exciting yarns that will elevate your next project! 4. Yarn Substitution This place is different. Unlike others, Yarn Substitution is a free, independent tool designed to help knitters and crocheters find suitable substitutes for discontinued or hard-to-find yarns. If your preferred yarn is unavailable or out of your budget, this tool provides a list of comparable options, ensuring your project stays on track without compromising quality. You can fetch any discontinued or rare yarn crochet, such as Bernat Boa Eyelash Yarn, Rowan Baby Cashsoft Merino, Tahki Yarns Tweedy Cotton Classic, and more. Additionally, specialized shops like Jannette’s Rare Yarns offer a selection of discontinued yarns from brands like Rowan, Noro, and Debbie Bliss. 5. Northern Knots Northern Knots offers products that can inspire and complement your crochet endeavors. It’s a crochet and macramé shop offering various handmade products and custom crochet macramé requests. They provide unique crocheted items made for you without you having to put in all the time and effort to sew and stitch everything yourself! You don’t have to spend hours making it from scratch, and the best part is you get the satisfaction of owning something handmade with love, and that too at an affordable price. Calculating Yarn for Your Crochet Project If you’re wondering exactly how much yarn to buy for your crochet blanket, here’s a simple way