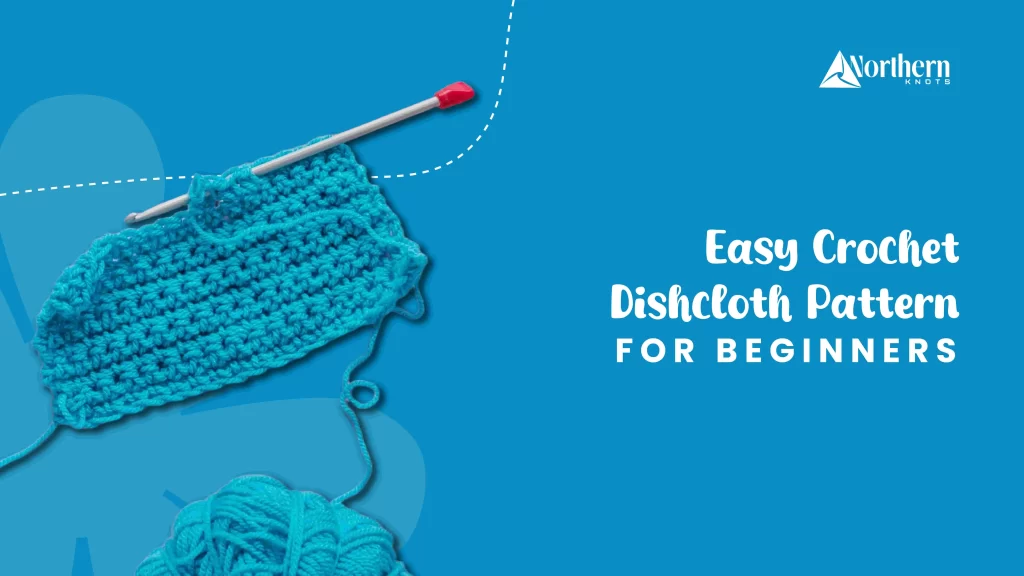
Are you tired of your dish towels that leave your dishes damp and streaky? The tidiness of kitchen utensils is something we all value. When your dishes are spotless and gleaming, it’s almost therapeutic to spend time in the kitchen, all soaked up in the beauty and radiance. You can achieve that level of cleanliness and the best part is that with the help of hook and yarn, you can create a crochet dishcloth that wipes it all down for you and is easily washable. What is a Dishcloth? A dishcloth is a small, square cloth used for washing dishes, cleaning surfaces, or wiping up spills. First, let’s go over the stitches and materials as well as the steps to create a crochet hand towel. Stitches Materials Make a Slip Knot First Create a Crochet Chain The first step to starting your crochet dishcloth is making a foundation chain. Don’t worry, it’s quick and easy! Everyone holds their yarn differently, so find what feels best for you. Drape the yarn over the index finger and hold it lightly between your index and middle fingers. Then use your thumb and ring finger to steady the yarn’s loose end. With your slip knot already on your hook, it’s time to make your first chain stitch. To do this, simply loop the yarn over the hook (called “yarn over”) and pull it through the loop on your hook. For this beginner crochet dishcloth, you will need to make 32 chain stitches as the base. Crocheting a Dishcloth Comes in Three Different Steps It is important to learn three different stitches for your own ease. It isn’t complicated at all, so don’t worry about it; they are just stitches built upon each other and once you learn to do a single crochet, it will be easy for you to learn double or triple crochet. How to Single Crochet After chaining your 32 stitches, turn around your work and start working in the other direction. You will now be going into the single-crochet chain and you can also make an entire dishcloth from a single crochet chain but it gives a nice tight weave. To single crochet, you simply insert the hook, with the loop on it, into the first chain after turning your work. Next, you hook the yarn and pull it through the chain; you will then have two loops on your hook. You then hook the yarn again and pull it through the two loops. You have completed a single crochet stitch. For this simple crochet dishcloth, you will complete four rows of single crochet. Each time you turn in your work, you need to chain one between rows. Then, work into the first stitch. How to Double Crochet After completing four rows of single crochet, it’s time to make one row of double crochet. First, chain three and turn your work. Wrap the yarn around your hook once. Next, insert the hook into the next stitch, yarn over to grab the yarn, and pull it through. You will have three loops on the hook. Yarn over again and pull through two of the loops. Yarn over one more time and pull through the last two loops. You have now finished a double crochet. Continue this across the entire row. How to Triple Crochet After completing your work, you will have four chains. Wrap the yarn around your hook twice, insert it into the next stitch, and pull the yarn through, resulting in four loops. Yarn over and pull through the first two loops (three loops left), yarn over again and pull through the next two (two loops left), then yarn over and pull through the last two. You’ve completed a triple crochet. Work the triple crochet all the way to the end of the row. When you reach the end of the row, chain three and turn your work. You will now do another row of double crochet. Free Dishcloth Pattern Here is a quick and easy dishcloth pattern review that’s both practical and fun to make! Does Handmade Dishcloth Clean Well? YES! Everyone prefers handmade crochet dish cloth and it just feels good to wipe the dishes and the counters with something handmade, right? It’s not just about cleaning; it’s about adding a touch of effort and care to your daily routine, knowing every stitch of this crochet kitchen towel was made with love! Now that you know what stitches you’ll need to know, all about the yarn and the basics of what we’ll be crocheting, you can get started on this easy crochet dishcloth pattern! Remember, take your time, read the pattern thoroughly, and practice as much as you can. Now all that’s left to do is grab your crochet hook and yarn something unique for yourself or your loved ones. Frequently Asked Dishcloth Questions Store bought crochet hand towels are great too, but there is an obvious beauty in dishcloths that are handmade and without the help of machines. You can even add a strand of scrubby yarn along with the cotton yarn to make an extra-thick crocheted dishcloth. Avoid cutting the yarn too close to the knots, as this can cause it to unravel over time. Additionally, ensure your stitches are tight and consistent, especially around the edges, to keep the dishcloth durable during use and washing. A crochet hand towel can be washed with the rest of your laundry. When in use, be sure to ring out the dishcloth really well to avoid any musty smell. Absolutely! Dishcloths are a perfect project for using up leftover yarn. Just make sure all the yarns used are of similar material (preferably cotton) to ensure consistent texture and durability.
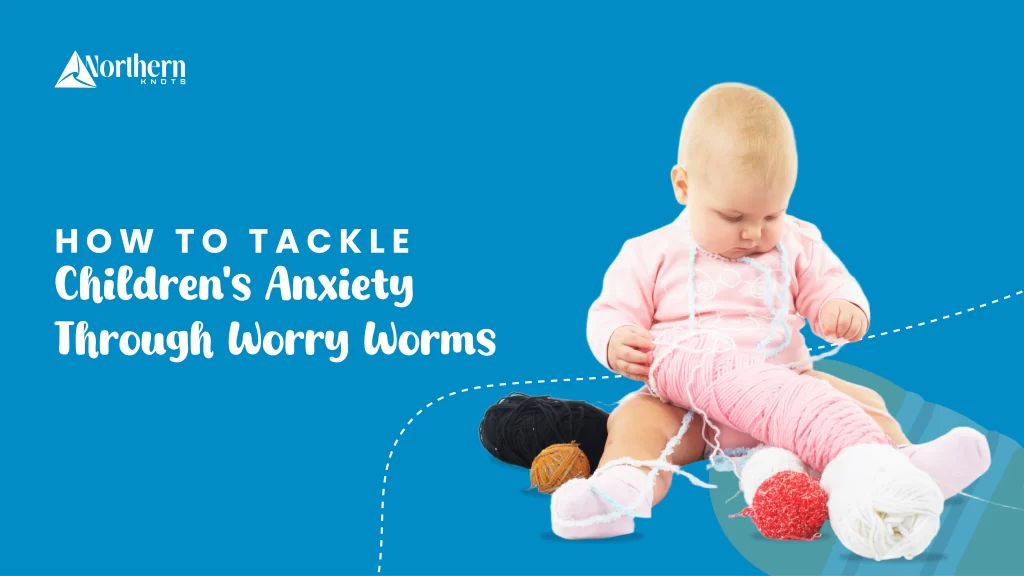
One of the hardest things about anxiety, especially for kids, is figuring out how to talk about it. Big feelings like worry can feel so jumbled up and to put them into words seems impossible. Worry Worms works as adorable, squiggly little helpers to throw anxiety out of your mind and into the open where you can see them, talk about them, and even laugh at them. They might be cute and cuddly but they’re a creative and fun way to deal with the big emotions. These worms can give kids a fun, creative way to express their worries without feeling pressured to explain everything out loud. Let’s find out why they’re such a brilliant way to help kids feel calmer and more in control! What Is a Worry Worm Used For? When we let our worries sit inside our heads for too long, they can feel like they’re growing bigger and scarier. Worry Worm works as your tiny, pocket-sized buddy who’s always ready to listen. Kids can write down their worries on a little note and tuck it away with their Worry Worm. This simple act of sharing your concerns can make those worries feel a whole lot smaller. Some parents and teachers even use Worry Worms as part of a calming routine to help kids talk about their feelings in a safe, fun way. Worry Worms are often handmade and sold online or at local craft fairs. They come in all sorts of colors, shapes, and sizes, so you can pick one that feels just right for you or your child. Some sellers even include inspiring notes or tiny envelopes with each Worry Worm, making them feel extra special. You can check worry worms for sale out from stores online. Let it wiggle its way into your life! How Children Visualize Anxiety Through Worry Worms Visualizing anxiety can be tough, especially for kids, because worries often feel invisible and hard to describe. In this scenario, Worry Worms works because it’s a gentle, non-judgmental way to externalize emotions. Instead of feeling stuck inside their worries, kids get to see them, hold them, and even laugh at them. And when something feels less scary, it’s much easier to talk about it, face it, and eventually let it go.They come in, as a creative and fun bridge between what you’re feeling inside and what you can see and touch outside. 1. Giving Your Worries a Physical Form Anxiety can sometimes feel like a giant storm swirling around in your head but with the use of a Worry Worm, you’re giving that storm a shape. You can write down your worries on a small note or a scrap of paper, fold it up, and place it near your Worry Worm. Suddenly, that invisible worry now has a physical presence, making it less mysterious and more manageable. 2. Using Texture to Express Emotions Worry Worms often come in bright, cheerful colors, but you can also find or make ones that reflect how you feel. Maybe a soft, pastel worm helps you feel calm, or a bold, fiery red one matches a more intense feeling. The textures of these crocheted items are fuzzy, squishy, or smooth and can also offer a tactile experience that soothes your nerves while symbolizing your emotions. 3. A Safe Space for Your Worries When you share your worries with a Worry Worm, you’re essentially giving those feelings a “home” outside your mind. Some kids like to keep their Worry Worms in a special pouch, jar, or drawer. Every time they feel overwhelmed, they can revisit their worms, read their notes, or even talk to their worms about what’s bothering them. This makes anxiety feel like something you can handle one small piece at a time. What are the Perfect Occasions for these handmade gifts? 1. Back-to-School Season Heading back to school can be nerve-wracking for kids (and even parents!). New teachers, new friends, and the pressure to keep up can stir up a lot of anxiety. Gifting a Worry Worm during this time can be a sweet way to remind kids they have a little buddy to help them through those first-day jitters and beyond. 2. Birthdays Worry Worms also make the perfect handmade gift for birthdays. These fun toys can make birthdays super special and meaningful. Get a colorful Worry Worm tucked into a gift bag and send it to the birthday child. This will show how much you care about their happiness and their feelings. 3. Exam Time or Big Events Kids often feel overwhelmed during exams, recitals, or sports competitions. A Worry Worm can act as a comforting token, reminding them they’re not alone and encouraging them to breathe and take things one step at a time. 4. When Someone’s Feeling Down A Worry Worm can be a small but meaningful gesture to lift their spirits especially for someone who is having a bad day, a fight with a friend, or just feeling anxious for no reason. 5. Christmas or Other Holidays Worry Worms make amazing stocking stuffers or thoughtful additions to holiday gift exchanges. They’re small, personal, and bring a little extra warmth and love to the season. 6. As a “Just Because” Gift Sometimes the best gifts are the ones you give for no reason at all! A Worry Worm is perfect for those random moments when you want to let someone know you’re thinking about them. Bring this comforting buddy, a trusted listener, and a tiny source of daily encouragement to your home and see for yourself how this cute little keepsake removes all your worries!
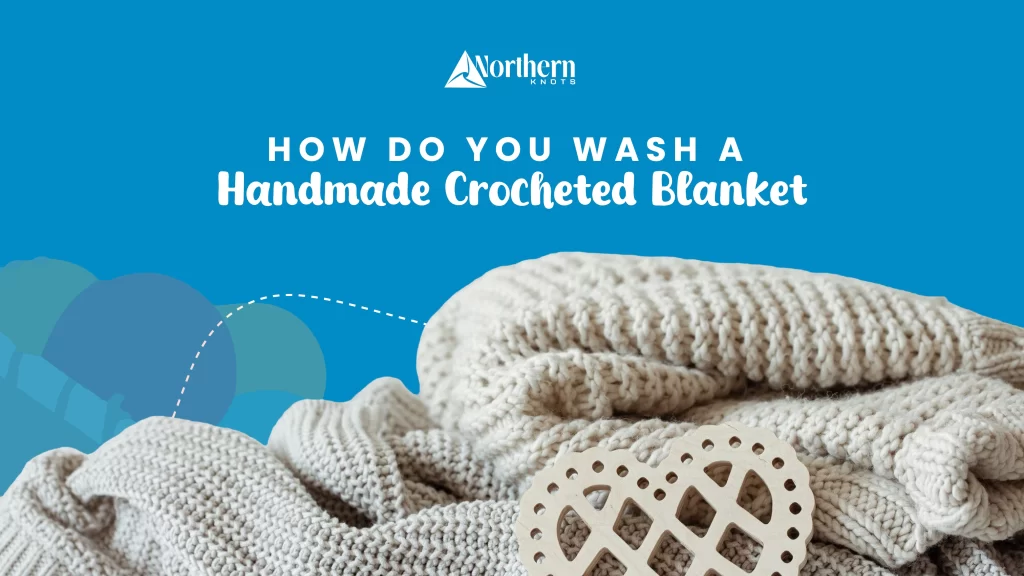
Crocheted blankets are like a snuggly hug for any room, instantly making it feel warmer and more inviting. These blankets bring a little extra charm to your space, no matter where you got them from. But, like anything you love, they deserve some tender loving care to keep them looking great for years to come. However many people don’t know the right way to wash handmade crocheted blanket. Most of them don’t know the right techniques that can keep these blankets fresh and fluffy. Check the Yarn Care Instructions Before starting the washing process, it is important to check the care instructions for the yarn that you used in your handmade crocheted blanket. It is not enough simply to wash different fibers in the same washing condition, as their needs are different. Therefore, you should be well-informed on whether your blanket is made of wool, cotton, acrylic, or a blend. It usually is the occasion that yarn labels have directions for machine washing, hand washing, drying methods, and temperature settings. If the blanket was a handmade gift, you can often ask the creator for advice on care instructions. Test for Colorfastness To keep the colors from bleeding, especially if the handmade crocheted blanket is brightly colored or uses multiple shades, it is a good idea to test for colorfastness. You can do this by dipping a small, hidden area of the blanket in cold water with a bit of mild detergent. Let it sit for a few minutes, then rinse. If the water runs clear, you are good to go. If the dye runs, you may need to hand wash the blanket separately or use a color catcher sheet. How to Wash Your Crocheted Blanket Once you are familiar with the yarn type and tested the colors, you can decide whether to hand wash or machine wash your handmade crocheted blanket. Both methods are effective, but the method you choose depends on the blanket’s size, the yarn type, and personal preference. Hand Washing Method Hand washing is the gentlest way to clean a crocheted blanket, especially for delicate yarns like wool or alpaca. Machine Washing Method If your blanket is made of durable, machine-washable yarn like acrylic, you can use your washing machine, but it is important to be cautious. Drying Your Crocheted Blanket After washing, drying your handmade crocheted blanket properly is just as important as cleaning it. The wrong drying method can result in shrinkage, misshaping, or damage to the fibers. Air Drying (Preferred Method) Air drying is the best way to save the shape and texture of your blanket. Avoid using a tumble dryer, as the heat can cause damage to the fibers. Using a Dryer (For Acrylic and Durable Yarns) For blankets made of acrylic or other synthetic fibers, you may be able to use a tumble dryer on a low heat setting. Storing Your Crocheted Blanket Once your handmade crocheted blanket is washed and dried, proper storage is important to keep it looking its best. If you follow proper care instructions, then your crocheted blanket will be a constant source of warmth and joy in your home. The above cleaning way if followed can make your crochet blanket clean, fresh, and intact for years.
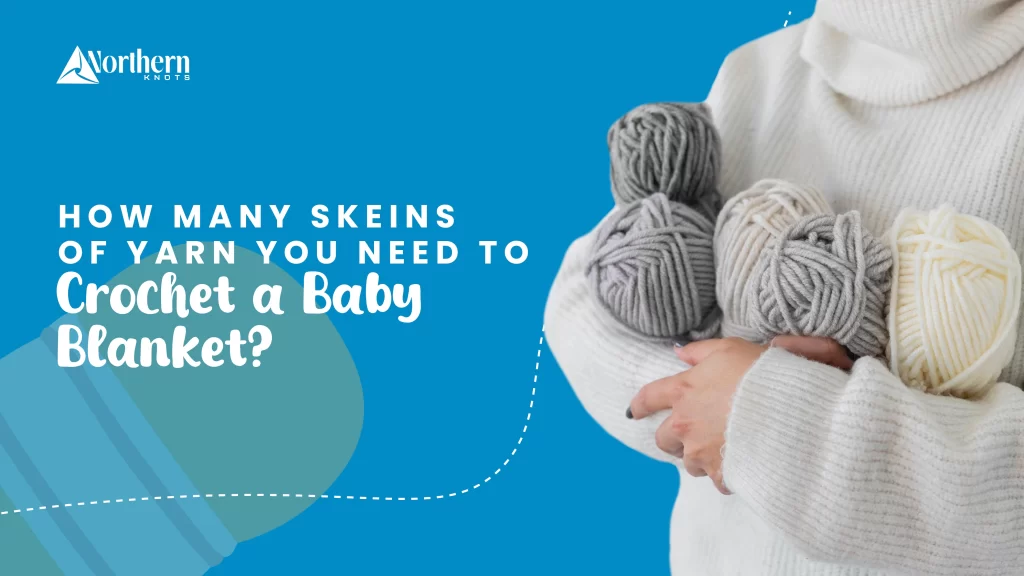
This heartwarming gift project is for new mommies, grandparents, or anyone looking to create something unique for their loved ones. However, one of the most common questions from the new mommies is how to crochet a blanket for their baby, what the right size for a baby blanket is, and how many yards of yarn in a skein is. Whether crochet a weighted blanket to give the baby a cozy feeling. These questions alone can be intimidating enough for a person to step back. But Northern Knots heart-warmingly explains this step by step so that you can easily crochet a beautiful baby blanket. How Much Yarn Do You Need to Crochet a Baby Blanket? This is the amount needed to crochet the best yarn for a baby blanket, which depends on the size of the baby blanket, the type of yarn used, and the crochet pattern. However, it’s important to keep in mind these are just rough estimates. The yardage of yarn that one will actually need has a little bit to do with the type of stitch pattern and how thick the yarn is. The chunky yarn needs much fewer yards than light yarns. So remember to take all these factors into account whenever you start planning your project. How many yards of yarn in a skein? Yarn is sold in skeins or balls. It depends on the yardage per skein and how many you will require. For example, it will take about 4 to 6 skeins of worsted-weight yarn to make a medium-sized baby blanket crochet, depending upon the skein and the yarn, which will run around 200 to 220 yards per skein. However, bulky yarn, with about 100 to 120 yards per skein, may require 10 to 12 skeins for the same-size blanket. Always check the label on your yarn for the exact yardage. Most crochet patterns contain detailed yarn requirements, including how many skeins you buy. Choosing the Right Yarn for a Baby Blanket Choosing the best yarn for a baby blanket is very important because it has to be soft, safe, and durable. Babies have sensitive skin, so look for yarns labeled baby-friendly. These include soft and non-irritating materials like acrylic, cotton, or bamboo blends, The other factor to consider is washability. Babies are messy creatures, so selecting a yarn that allows for machine washing would be great. Acrylic yarns are also excellent because they are strong, inexpensive, and come in various colors. Natural fibers, such as bamboo and organic cotton, are also fantastic for babies with sensitive skin allergies because they are generally hypoallergenic. How Big Should a Baby Blanket Be? It will also depend on the baby blanket’s use and its age. A receiving blanket that is 30 by 30 inches is very suitable for swaddling and for light coverage at birth. For infants, it can be around 36 by 36 inches, and it can double as a play mat or a stroller cover. For toddlers, a size similar to 36 by 48 inches is great for napping or to serve as a security blanket. Size would also consider its practicability. A small blanket will be easy to carry and useful for several purposes when the baby has grown up. If a blanket is going to go in a particular place, such as a crib or in the car seat, then its measurements should be taken into consideration for fitting purposes. Tips on Crocheting Your Baby Blanket It is exciting when a beginner starts with very simple designs as they are starting their crochet project. Here are some useful tips for beginners: End on a soft finish The most useful stitches one can add to baby blankets are either single crochet stitches or double crochet stitches, and these will give the finished blanket a firm yet soft finish. Stick to such foundational stitches if you are a first-time crocheter as you become comfortable with the process in its entirety. Opt for funky colors Plan your color scheme ahead of time to ensure that your crochet rectangle blanket isn’t a jumbled mess. Soft pastels or neutrals are popular picks for baby blankets, but don’t be afraid to get bold or multi-colored to make your project stand out. Choose the right hook size The hook size is important to ensure that the desired texture and drape are achieved. Most yarn labels will indicate the recommended hook size. A larger hook will result in a looser, softer blanket, while a smaller hook will produce a denser, warmer fabric. It is always a good idea to test your gauge before starting the project. Crochet a small swatch to determine if your stitches match the pattern’s requirements. Add a decorative border Adding a decorative border can give your baby blanket a more polished finish. Scallop or picot edges are easy to crochet and add an element of class to your finished project. It can also help to increase the weight of the blanket. Conclusion Making a baby blanket is more than making a functional product; it is a labor of love. Knowing how many yards of yarn in a skein you will use can help you easily with the whole crocheting process. Choosing the best yarn for baby blanket, size, and design can create a keepsake that will be treasured for years to come. Whether you’re making a lightweight receiving blanket, a playful toddler cover, or a crochet weighted blanket, the process is as rewarding as the finished product. Enjoy every stitch, and remember—your handmade blanket carries the warmth of your motherhood effort and care. Handmade items hold a special place in the heart, and while you watch your baby grow, the memory will be cherished over time.
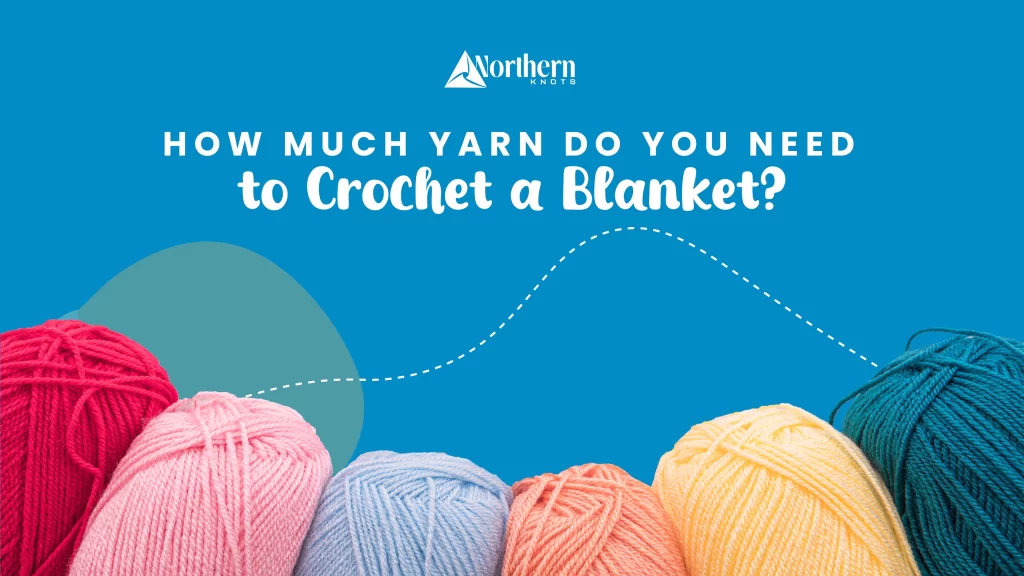
Crocheting a blanket is one of the most comforting and rewarding projects you can undertake. The rhythmic motion of the hook and yarn as you stitch together makes the entire creation process heartwarming. Before people start crocheting, they need to know how much yarn they need to crochet a blanket. This is essential, especially when creating soft, warm throws for your couch, a snuggly weighted baby blanket, or a luxurious crochet-weighted blanket. Remember that all yarns come in various types, weights, and fibers, and the amount you’ll need can vary significantly based on the size of your blanket, the yarn you choose, and the factors that influence yarn amount. Factors That Influence Yarn Amount There are several factors that influence how much yarn you need for your crochet blanket: Firstly, it’s the size which determines how much yarn you need. It could be a small lapghan, a cozy throw, or a full-size bedspread, the dimensions of your project will dictate the yardage you’ll need to knit anything. Yarn weight plays a big role in how much yarn you need. Thicker yarns, such as bulky or super bulky yarn, will require fewer yards than finer yarn, like fingering or sport weight. Different crochet stitches require different amounts of yarn. For example, a simple single crochet stitch uses more yarn than a double crochet stitch. Patterns with intricate stitches, like the chevron stitch or granny squares, can also impact the total yarn requirement. Every crocheter has a unique tension, meaning the tightness or looseness of your stitches. If your tension is looser, you may need more yarn to reach the intended size. Always check your gauge to avoid running out of yarn mid-project. How Much Yarn Do You Need for Different Blanket Sizes? Here’s a breakdown of yarn estimates for standard blanket sizes based on different yarn weights. These are rough guidelines to give you a starting point: Of course, these are rough estimates, and your specific project might require more or less yarn, depending on the abovementioned factors. If you’re unsure, buying a bit of extra yarn is always a good idea. You don’t want to get halfway through your crochet weighted blanket only to discover you’re short! How Can I Choose the Right Yarn for My Blanket You need high quality yarn for crochet. The yarn you choose will influence your crochet blanket’s feel, texture, and durability. Here are some options for different types of yarn that can be used to create beautiful blankets: Top Picks for Best Yarn for Crochet in 2025 Choosing the right yarn can make a world of difference when crocheting blankets. Whether you’re crafting a cozy throw, a soft baby blanket, or a chunky weighted crochet blanket, the yarn you select will set the tone for the final result. Here are some of my favorites that I can’t recommend enough – each with unique qualities that make crocheting a dream! With so many amazing yarns, you’ll find one that ideally fits your crochet needs. The most in-demand is I Love This Yarn! From Hobby Lobby. It’s been an absolute favorite for many reasons. The main one is its worst weight, which is made from 100% acrylic. The best part is that it doesn’t glide smoothly on clover hooks and is super easy to wash and maintain. Now, coming to get the price, you get 252 yards per skein for just $4.99! They’ve been putting 30% off yarn sales every other week. This christmas, that might’ve put something big. Make sure to check their website. 2. Lion Brand Yarn Lion Brand Yarn is another emerging brand, but yes, the price of $51.99 can raise some eyebrows. Their best is the cover story yarn, which is bulky and comes with 547 yards per skein. This one skein is enough to complete an entire full blanket. You can make an entire 36″ x 46” blanket with just one ball – yes, the yarn is vast! You’ll often find it on sale at Joann Fabrics and Lion Brand’s website, so look out for deals. 3. Yarnspirations Yarnspiration is a fan favorite. It’s hands down the bulkiest yarn, perfect for making soft, squishy blankets. The yarn is 100% polyester, so it’s soft yet durable. With more than 100 color options, you’ll have no trouble finding the perfect shade for your project. Their new collection features vibrant, playful colors perfect for spring or creating fun, bold designs. If you love creating statement pieces, this yarn is perfect for crochet projects like throws, scarves, or blankets with eye-catching color combinations. Yarnspirations constantly updates its offerings, so checking out its new arrivals is a great way to discover fresh, exciting yarns that will elevate your next project! 4. Yarn Substitution This place is different. Unlike others, Yarn Substitution is a free, independent tool designed to help knitters and crocheters find suitable substitutes for discontinued or hard-to-find yarns. If your preferred yarn is unavailable or out of your budget, this tool provides a list of comparable options, ensuring your project stays on track without compromising quality. You can fetch any discontinued or rare yarn crochet, such as Bernat Boa Eyelash Yarn, Rowan Baby Cashsoft Merino, Tahki Yarns Tweedy Cotton Classic, and more. Additionally, specialized shops like Jannette’s Rare Yarns offer a selection of discontinued yarns from brands like Rowan, Noro, and Debbie Bliss. 5. Northern Knots Northern Knots offers products that can inspire and complement your crochet endeavors. It’s a crochet and macramé shop offering various handmade products and custom crochet macramé requests. They provide unique crocheted items made for you without you having to put in all the time and effort to sew and stitch everything yourself! You don’t have to spend hours making it from scratch, and the best part is you get the satisfaction of owning something handmade with love, and that too at an affordable price. Calculating Yarn for Your Crochet Project If you’re wondering exactly how much yarn to buy for your crochet blanket, here’s a simple way
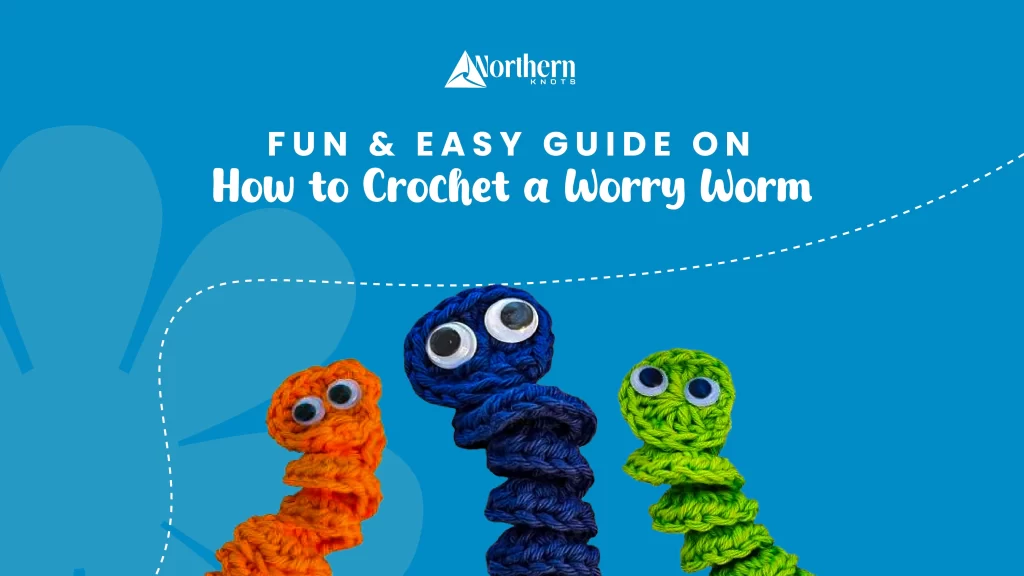
Do you love spending your time crocheting small and cute things? Then here you go, a simple guide to crocheting a tiny Worry worm that can take away all your stress. It can be great as a gift to give to your friend to spread a little happiness. Introducing the crochet worry worm teeny, squiggly friend that is easy to make, beginner-friendly, and sure to put a smile on anyone’s face! Whether you are a beginner at crochet or an experienced crafter, this tutorial will show you just how easy it is to make these cute and comfy little creations. Grab your yarn and hook because it’s a fun and stress-free crochet journey! What Are Worry Worms? People are getting crazy over crochet little items and worry worms are one among them. They are little, curly crochet creatures with large googly eyes. Soft yarn is mostly used to create these crochet products, making them perfect as tools for the spreading of joy and comfort. Some people often pass them through random acts of kindness while others use them as little gift-giving stuff to friends or family. These cute little creatures are known for their comforting purpose. Be it for kids, someone feeling anxious, or just as a fun gift, worry worms are great for reminding us to smile and let go of stress. The best part of these worry worms is that they are super easy to crochet and can be made in under 10 minutes. So if you’re a beginner crocheter, this is the perfect project to boost your confidence! How to Crochet a Worry Worm for Beginners If you’re just starting out with crochet, then know that it takes literally a few minutes of work to crochet a worm. It is as easy as anything can be. You just need to know a few very basic stitches, and just a little time and practice will have you making your first worry worm in no time. Here’s what you’ll need to get started: Yarn Pick any yarn you’d like. Thicker yarn will make a fatter worm, and thinner yarn will make a more fragile worm. Acrylic yarn is fantastic for beginners! Crochet Hook You’ll want to use a hook size that’s paired with your yarn-most beginners start with a 4mm or 5mm hook. Googly Eyes or Embroidery Floss You can add fun googly eyes to give your worm a personality, or stitch eyes with yarn for a homemade touch. Scissors You will need the scissors to cut the yarn and tie it into a knot or if you are making separate strands. Yarn Needle To sew in the ends and make them hooked together. If you are using googly eyes, you just need glue for it. The plastic eyes won’t be sewn with a needle. Crochet Worry Worm Pattern The pattern of crocheting a worry worm generally entails making a long spiral-shaped body by using a series of stitches such as single crochet, half-double crochet, or double crochet. Patterns can be made in any length, color, or design, and the worm can be more or less a classic one-color version or brightly multicolored. For special events, the worm can be made with a party or holiday theme. Follow these step-by-step instructions to crochet your themed worry worms. Make a Slip Knot Start by creating a slip knot on your crochet hook. This is the foundation for your crochet worry worm. If you’re not familiar with how to make a slip knot, then just tie a simple loop that tightens around your hook. Create a Chain Chain about 25-30 stitches (or more if you want a longer worm). To do this, yarn over and pull the yarn through the loop on your hook. Repeat until you have your desired chain length. The chain will determine how long your worm will be! Make the Spiral This is where it gets magic! Insert your hook to work 2 single crochets in each chain and stitch down that chain all the way. With this doubling of stitches, your work will start to curl into a spiral form as you work it along. Insert your hook through the first chain stitch on the hook. Turn the yarn over and pull that chain through. Yarn over again; pull through both loops. And that is one single crochet. Work one more single crochet into the same chain stitch, and continue this pattern 2 SC per chain, until you reach the end of the chain. Finish Off Once you’ve worked 2 single crochets into each chain and reached the end, cut your yarn, leaving a tail about 6 inches long. Yarn over and pull the tail through the last loop on your hook to secure it. Final Thoughts And that’s all. Here is how you can crochet an adorable worry worm in no time. These cute little spiraled creatures are not only easy to make but also ideal for gifting, spreading kindness, or keeping as a cheerful reminder to let go of worries. With a few more requirements along with yarn like a hook, and a splash of creativity crochet your own worry worm to either give away as a gift or keep it as your comfy little companion.
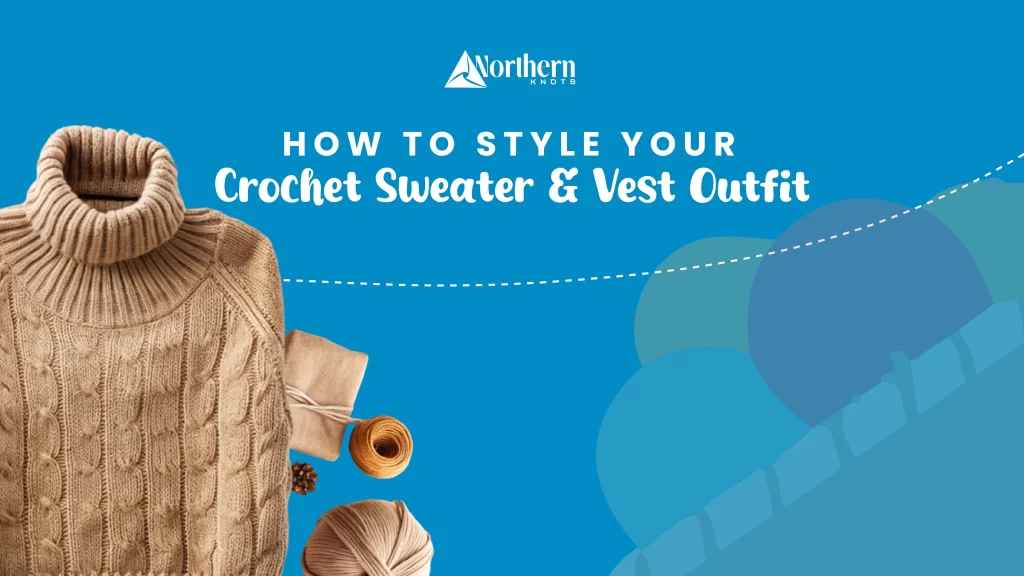
Fashion is an ever-evolving world with various trends coming and going. What has managed to stick around as a timeless piece of vintage and chic fashion are crochet vests. Simple and sleek, these vests can enhance every outfit for the better. These come in sizes for both women and children which makes it a go-to choice for light outerwear for both kids and adults. However, as it is with everything else, there are certain ways to style crochet vests to get the most out of them, even though they can fit in everywhere. If you are looking to style a fashionable crochet sweater outfit, here are some style trends you can follow to make this outfit look even better. Style 1 Layer with Confidence One way you can make the most out of your crochet sweater outfit is by layering it with other clothing items. For a casual, laid-back look, wear this Womens Crochet Vest with a basic T-shirt or tank top. Wear high-waisted jeans or leggings for comfort, and a casual vibe. When it gets a bit cold for your liking, layer the crochet vest over a long-sleeve shirt for an added cozy touch. You can also wear these vests with turtle neck shirts. Just don’t forget to top your outfit off with a denim jacket or a sleek blazer for added warmth and a modern twist. Add Some Denim Denim and crochet vests are an evergreen combination, and can never fail to impress. This combination works perfect for both adults and kids, you can even have your child wear a child crochet vest with denim. Dress your little one in their favorite pair of jeans, denim shorts, or denim skirt for a chic outfit. Just make sure to choose light-wash denim, as it shall give off a fresh vibe. If you prefer dark denim, then just wear darker colors to match the overall theme. Embrace a Bohemian Look If you prefer the boho-chic vibe of fashion, crocheted vests for ladies can be your new best friend! You can pair your crochet vest with flowy skirts or wide-legged trousers for a relaxed and laid-back bohemian outfit! Look for earthy tones like beige, mustard, and rust to properly channel the vibe you want. Add a floppy hat, layered necklaces, and sandals to complete the bohemian aesthetic. Pair it with Accessories A crochet sweater vest top is already something that is sure to stop traffic, and the right accessories alongside it is the best way to make the most out of your outfit! A belt around the waist can help define your look when wearing a loose-fitting crochet vest. You can also add chunky boots to add contrast, or dress it up with fancy jewelry for a more polished and suave look. A simple scarf or shawl adds warmth and texture while keeping the focus on your crochet piece. Go Monochrome For a clear-cut and clean crochet sweater outfit, try to pair your crochet vest with matching colors. Like our pastel red crochet vest, go for neutral shades such as white, cream, or other pastels. This will help you stand out while giving your outfit a sophisticated, put-together vibe. You can even match your crochet vest with coordinated pants or skirts, or go for the same color scheme when choosing your accessories. Mix with Modern Pieces Wearing your crochet sweater with more modern options has the power to make your outfit look more fashion-forward with a vintage vibe. You can try various combinations like pairing your crochet vest with leather pants, or maybe wearing your crochet sweter vest with a button-down shirt and dress pants. By mixing textures like pairing crochet with sleek leather or crisp cotton, you can create a visually appealing contrast of material. Show Off Your Legs If you’re feeling a bit daring, you can style your crochet sweater outfit by wearing your crochet vest with short shorts or a mini skirt. This works especially well with oversized crochet sweaters, as they can act as a cozy cover-up, leaving your legs exposed for balance. Go with boots or sneakers for footwear, as they shall complement this stylish, laid-back look. Style 2 Dress up in Casual Layers This crocheted vest is specially handcrafted and customized for kids as well. You can pair the red crocheted vest sweater with a plain white or striped long-sleeve shirt. The neutral base makes the vibrant red pop while keeping the look balanced. You can even pair jeans or corduroy pants to make it a more kid-friendly outfit that’s perfect for school or playdates. A floral skirt or leggings can also make this outfit look so cute. Dressed-Up Charm for Special Occasions You can even turn the vest into a fashion statement for parties or family gatherings by layering it over a collared shirt or a turtleneck. You can pair it with a plaid skirt and can accessorize with a bow tie or a sparkly hair clip to show some of that personality. Last Thoughts The red vest adds a festive flair, while the dressier elements make it occasion-ready for both women and kids. The crochet texture gives it an artisanal feel, setting your little one apart with unique, handmade charm. If you want this particular crochet sweater vest top then make sure to shop it now from here.
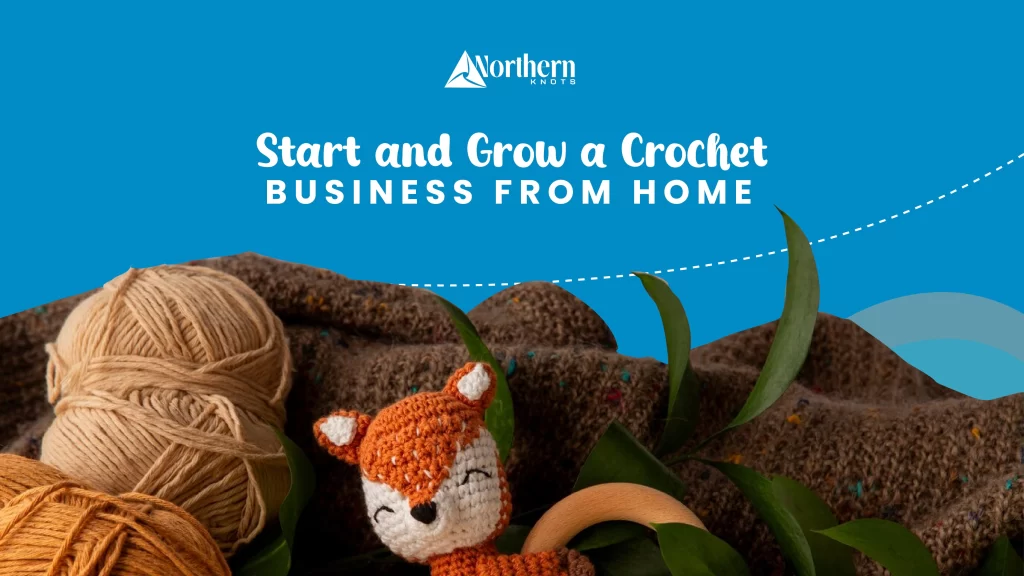
It is amazing how a ball of yarn turns into a warm scarf, a blanket, or an adorable stuffed toy. For many, it’s more than just a hobby; it is a passion. Turning your love into a crochet business is an exciting venture indeed. It’s an opportunity to share handmade creations with the world while earning from something you love doing. Starting a crocheting business could seem like a ton of work at first, but the right steps and a little determination will build a happy business right from your own home. Create Your Ideal Workspace Before you start selling, take some time to create a dedicated workspace. It’s likely very tempting to crochet from the couch or your bed. Get yourself a corner with good lighting, comfortable seating, and storage for your yarn, hooks, and other tools. Keeping things tidy will make it easier to focus on your work. Use bins, shelves, or even a pegboard to store your supplies in one place. This will help you find what you need, saving time and reducing stress. Plus, a visually inspiring space can spark new ideas for your creations. Plan on What You’ll Sell Now that you have your workspace ready, decide what you want to crochet and sell. Start with little items, but keep an eye on which items are in demand. Some of the popular items are round baby blankets, cozy hats and scarves, and cozy mug rugs. Then you can present yourself to customers if you offer a variety of smaller projects as well as some more detailed ones. Choose Quality Materials Good quality materials must also be used. Use soft, durable, and beautiful materials that people can pay a higher and fair price for. Also, the item will look better, feel better, and be different, and you will stand ahead of the competition as the best. When it comes to pricing, be fair to yourself. Evaluate the materials, the cost, and the amount of time it takes to make each item. Keep an eye on what items are selling for, but by no means undervalue your work. “Your time and skill are worth being paid for” Build Your Brand Start your brand by picking a name that mirrors your style. Then, create a simple logo and choose a look for your social media accounts, website, and packaging. This helps people recognize your work and builds trust in your business. Share your story, why you were inspired to crochet, and what inspires your designs. Give a discount or free pattern to get people interested in signing up on your mailing list. Update them with new products, special offers, and tips and tricks about crochet. Get Started on Selling Online platforms are great for reaching a broader audience. Local markets are also perfect for connecting with people in your community. However, an online presence is a must. Even if you want to sell locally, keep an Instagram account or a website built well to be in connection with. Use great-quality, clear, and well-lit images of the products, add descriptions, and behind-the-scenes to engage the people. Stay Active on Social Platforms Keep busy on social media; share often and use hashtags. Share progress shots, tutorials, or quick videos showing how you work. Social media isn’t about simply posting products; it’s about creating relationships. Listen for comments, answer questions, and engage. Collaborations with other creators can also help by reaching a wider audience. Collaborate and promote your products. For instance, you could ship a free product to an influencer in your local area for them to feature on their social media page. Grow and Diversify As your business is growing, consider how to expand. You can begin by selling crochet patterns for others to crochet so they make something too, or even host crochet workshops online or in person. Custom orders are another good way to go. Personalized items are always in demand, including monogrammed baby blankets or specific color combinations. Of course, custom work takes more time, but then you can charge a higher price and build a closer relationship with a client. Final words You can start your crochet business right at home as a way to integrate creativity with entrepreneurship. Follow the crochet business tips mentioned above and keep them in mind before jumping into the crochet business. With such an organized space to work within, high-quality products, and a strong relationship with customers, you will be able to combine your passion with business for profitability. The rise in popularity of crochet handmade goods has created numerous crochet business opportunities for crafters looking to turn their passion into a profitable venture. Be flexible, embrace new ideas, and above all, enjoy the process of sharing your handmade creations with the world. Your love for crochet is not just a selling venture, it is spreading joy through the art you love with a full heart.
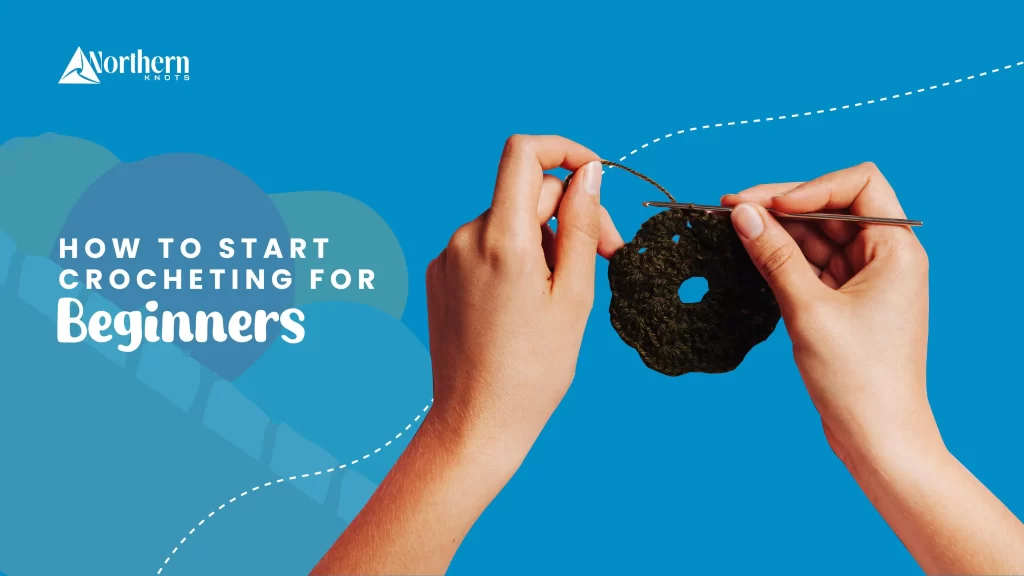
We all know crochet is fun and a relaxing hobby that anyone can do! But have you ever thought about turning it into a Crochet Handmade Product? You might also wonder, ‘how to start crocheting? Well, in this step-by-step guide, we will discuss how to get started with the basics to knowing the most common stitches. We are so glad that you decided to learn how to crochet! This is a craft that is super easy and fun to do because when you get the hang of it you can make just about anything. All you need to do is get used to holding your hook and your yarn, make a slip knot, crochet a chain, and you’re good to go! But let’s get into the details! What Do You Need to Start Crocheting? The best thing about crocheting is that you don’t need expensive tools to get started, the tools we need are already in the drawers of our houses. But most importantly, you will need yarn, the recommended size of crochet hook, scissors, and yarn needle. It is recommended to start off with the thicker yarn and hook (because it is easy to handle for beginners). But how would you know which yarn is suitable for your craft when you go shopping for it? This is the label showing what size your yarn is. Once you start, you will be looking for the size 4 and up. The yarn label usually states what size hook you will need. For size 4 yarn you will need a hook size 5.5mm or size I-9. How to Hold Your Hook There are no right or wrong ways to hold the hook but there are mostly two common ways, the knife hold, and the pencil hold. Everybody uses different methods and It is totally up to you how you hold it! Here’s How to Make Slip Knot You are going to make a slip knot and place it on your hook. The most common way to start your crochet project will be a slip knot. You will definitely want to know this because almost all patterns aren’t going to tell you to make one at the beginning of the pattern. The pattern is called a “magic circle,” but we’ll get to that in the next tutorial. Congrats, you made your first knot! Insert your hook into the slip and pull the working yarn. Make the tail end faces the end hook. The Second Step is to Hold Your Yarn Now lets conjure on how to hold your yarn. Don’t loose your excitement just yet, because this is the exciting part! Your tension is basically, determined by the holding of yarn. Whether your hand is right handed or left handed you hold the yarn with it relaxed and not tight, nor too loose. Take the slip knot attached to the hook and place it in your working hand between your index finger and your middle finger. Wrap it around your little pinky, then bring it up to the front side of the index finger; wrap it over to the back of the finger. How to Make a Starting Chain We know, crocheting your first chain will still feel hard but the more you practicum the more you get the hang of it. A starting chain is the number of crochet chain stitches that form the foundation for the rest of your craft. To make a starting chain: Working Into Your Chain This picture shows how you can count your stitches, the front should look like a series of interlocking Vs. Now Let’s Learn The Single Crochet The single crochet is probably the easiest stitch and first one to work for a beginner, suitable for your very first project. As one of the most accessible and most often used crochet stitches, the single crochet is shortened sometimes as “SC” in crochet patterns. Learn to Make A Turning Chain At the end of a row, you will turn your work over, do one or several chain stitches (that’s called the turning chain), and then begin the row of stitches. Turning the Work To turn your work, you simply turn it 180 degrees clockwise. Now, that other side is facing you, to ready yourself for the next row of stitches. Finish Off By Weaving The Ends You need to fasten off the yarn once you have completed the last row of your crochet swatch in order to secure the stitches properly. How to Fasten Off And that’s it! You can now create single crochet and make more squares for your blanket or any other craft you have in mind. In the end, learning how to start crocheting open up endless possibilities for making memorable and handmade projects.
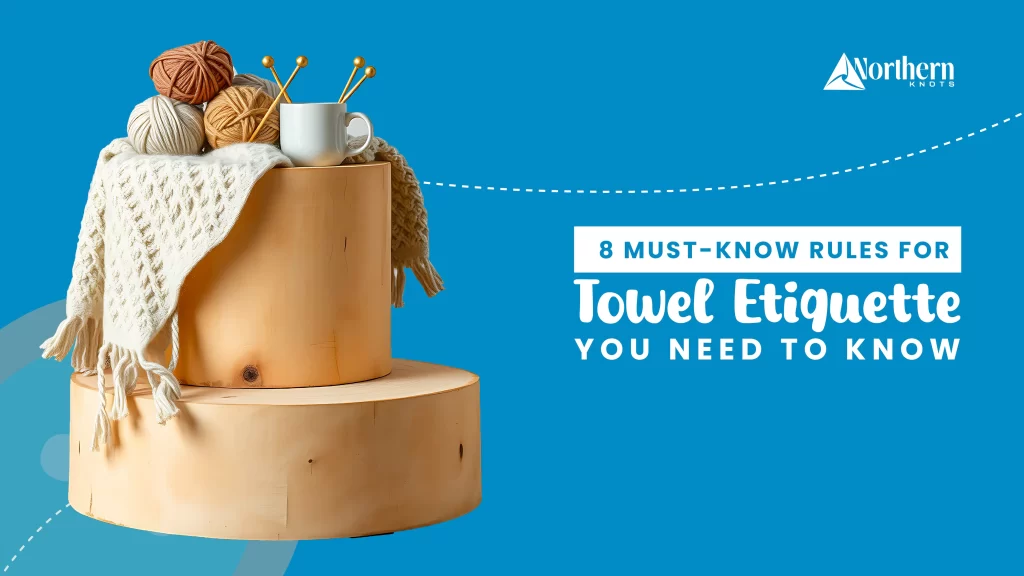
Did you know that there is an elusive etiquette surrounding towels? Yes, just like any social interaction for humans, there are some rules governing how we should treat and handle our daily wonders, and this towel etiquette for the best bath or kitchen towel sets might seem piffling. But mastering these rules can surprise your guests with smooth hospitality. Whether you are a host or a guest, you must know how important it is to maintain towel cleanliness for high-quality standards in your home. Use Specific Towels for Specific Tasks I feel that each household or setting should have different towels for different purposes. Using bath towels, hand towels, kitchen towels, and gym towels should all have their uses. It’s wrong to take a bath towel to the kitchen or use a dish towel for drying your hands. Not only does this rule serve to help stay clean, but it also helps to minimize contact with germs. Hosts Your Guests with Hospitality To be a great host, it is important to provide a welcoming experience to your guests with organic washcloths for face. Here’s where you can place them for easy access: Your restroom: This is the most logical spot for towels. Leave them neatly folded within a bucket next to your sink, where guests will automatically look for them. Bedroom: If your guests are planning to stay over, consider placing these towels on the bed. It will add a thoughtful gesture and ensure exactly where to find them. Some guests might have skin sensitivity, it is totally okay if they bring their own towels; that will save you your laundry duty! Don’t Use Kitchen Towels as Pot Holders As much as it is tempting, do not use kitchen towels to take care of pots and pans and replace them with pot holders. Cleaning clothes used in the kitchen are not appropriate for handling hot utensils and may cause burns or catch fire. Try using proper mitts! Keep Your Bathroom Towel All in Check Now you must be wondering, what is the size of a regular bath towel? It depends on which body area you want to dry off. Consider going for your personal preference for towel sizes. Well, just in case, a standard bath towel typically measures around 27 inches. Whether you choose a big size bath towel or just little companions to quickly dry your hands off, make sure your bathroom is tidy and well organized for your aesthetics. Handle Your Towels with Care The towels in our home are little absorbent buddies for us through every spill and splash, but taking care of them may seem a little sturdy. Just avoid using fabric softeners and strong detergents because, over time, the chemicals present in these destroy the fibers and reduce the absorbance over time. Instead, you can use mild detergents to wash them daily and avoid wear and tear. Sharing is Caring (But not Always with Towels) While sharing is generally considered good, sharing a towel is a breach of hygiene. Always use your towel rather than borrowing it because a towel, when damp, becomes a breeding ground for bacteria and stubborn germs. Make sure that everyone in your home has solid bath towels to avoid skin infections and breakouts. Mind Your Manners In areas like restrooms and kitchens, towel etiquette is very strict. Never use someone else’s towel, and never leave a wet towel lying on the bed or hanging on chairs. On the other hand, hang it up to dry on a hook or towel hanger, and make sure it dries well. Stock Up Your Kitchen with Neat Towels If you want your kitchen to stay tip-top, then 100 linen dish towels are perfect for the kitchen because they are absorbent and extremely durable to use. The one you think you should look for when shopping for kitchen towels is their size and density. Pick a cloth that will cover your biggest pots and still have enough slack to reach your smallest glasses with one hand. Final Thoughts to End With Demonstrating proper towel etiquette is easy, and it goes a long way in preventing the spread of germs and ensuring everyone respects shared spaces by keeping those towels clean for longer use. The presented rules serve as a guide to maintaining cleanliness, freshness, and order of the bath or kitchen towel sets, as well as respect for other people’s space at home or in public places. However, do not forget that a well-maintained towel will not only look best but is also most efficient while presenting your home. Happy drying!